
Custom Silicone Rubber Keypad | Push Button Supplier


| Share | |
|---|---|
| Categories | Custom Silicone Rubber Control Panel |
| Brand | FromRubber Silicone & Plastic OEM Manufacturer |
| Product Specifications | BH-Push Button |
| Material | Silicone Rubber |
| Hardness | Shore A 30-80 |
| Key Travel | 0.8-1.5 mm |
| Actuation Force | Matched to Key Area |
| Webbing Style | Cone, Dome, Flat, Double Web |
| Contact Type | Carbon Pill or Gold Plated |
| Printing | Silk Screen, Laser Etching |
| Feature | Backlight, Clear Legend |
| MOQ | 1,000 pcs per batch |
| Application | Control Panels, Instruments |
| FOB port | FOB ShenZhen |
| Terms of Payment | L/C, D/A, D/P, Western Union, MoneyGram, T/T |
| Download |  |
Custom Silicone Rubber Keypad Supplier
Push Button Keypads Built Around Force, Travel and Webbing
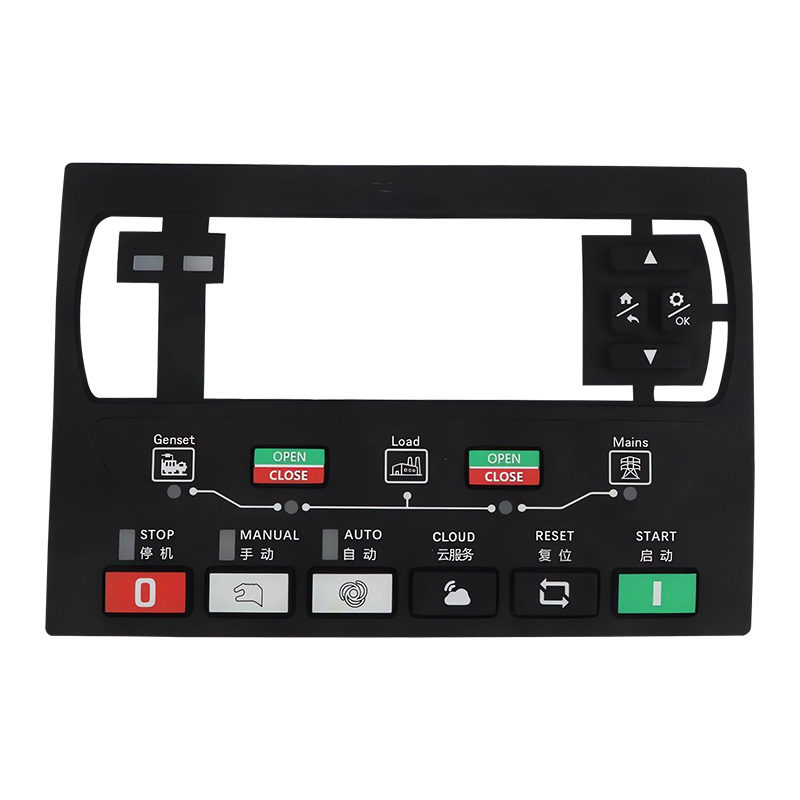
A custom silicone rubber keypad is a compression-molded rubber part where the key webbing itself provides the spring action that returns each button to its rest position. That webbing is molded in one piece with the keypad body.
So the tactile feel your operator gets is decided almost entirely by three numbers: the force the webbing returns, the distance it travels, and the way the wall is shaped. Get those three right and the button feels deliberate. Get them wrong and it feels either mushy or too stiff, no matter how good the legend looks.
We build keypads for push button interfaces on control panels, instrumentation and appliance front panels. Tooling, printing, laser etching and final inspection stay inside our own factories. How the molding step itself is controlled, from press size to preform weight and cure time, is set out on our silicone molding page.
Numbers That Decide How a Key Feels
Four figures cover most of what a buyer needs to know before asking for a quote.
Actuation Force by Key Area
Operators judge a keypad by their fingertips, and their fingertips judge it by how many grams it takes to close the switch. A small key concentrates that force into a small area and feels stiff; the same force spread over a large key feels light. That is why quoting one blanket force number is misleading — the right number changes with the size of each key.
All figures ±15%. Mixed layouts are normal — send the key sizes and we confirm the force group by group before the tool is cut. Changing webbing thickness after tooling is a re-cut, not an adjustment.
Four Webbing Styles and What Each One Feels Like
The wall connecting the key top to the keypad body stores and returns the energy. Four shapes cover most push button work, and the choice is made by stroke length and how crisp you want the release, not by cost.
A keypad can mix styles across one part: the function row on Cone, the large navigation key on Double Web. Height tolerance is the other half of that decision — a digital level silicone keypad shows how a few hundredths of a millimetre in dome height makes one key feel different from the one beside it.
Specifications You Can Set
| Parameter | Range | Why It Matters |
|---|---|---|
| Hardness | Shore A 30–80 | Sets rebound speed and how the surface resists wear |
| Base thickness | 0.8–1.2 mm | Too thick increases shrinkage and pulls keys off dimension |
| Key travel | 0.8–1.5 mm | Working window for conductive rubber; below it the switch may not close cleanly |
| Actuation force | Matched to key area | See the force bands above |
| Key layout | From your drawing | Pitch and key size drive the tool, not the other way round |
| Printing | Silk screen, laser etching | Legend durability and backlight capability |
| Backlight | Entire keypad or legend only | Depends on whether keys must be read or only located in the dark |
| MOQ | 1,000 pcs per batch | Entry threshold for a custom-molded part |
Numbers outside these ranges are reviewed case by case rather than refused — send the drawing and the operating conditions and we confirm what is achievable in the quote.
The Contact Type Decides Switching Reliability
Below the webbing sits the contact layer, and this is where most field failures actually originate, not in the rubber. Two options cover push button keypads.
Specifying gold on a clean indoor panel buys nothing. Contact resistance is matched to the PCB contact pattern on your board, so send the pad layout with the drawing.
Backlight and Legend Are Decided Together
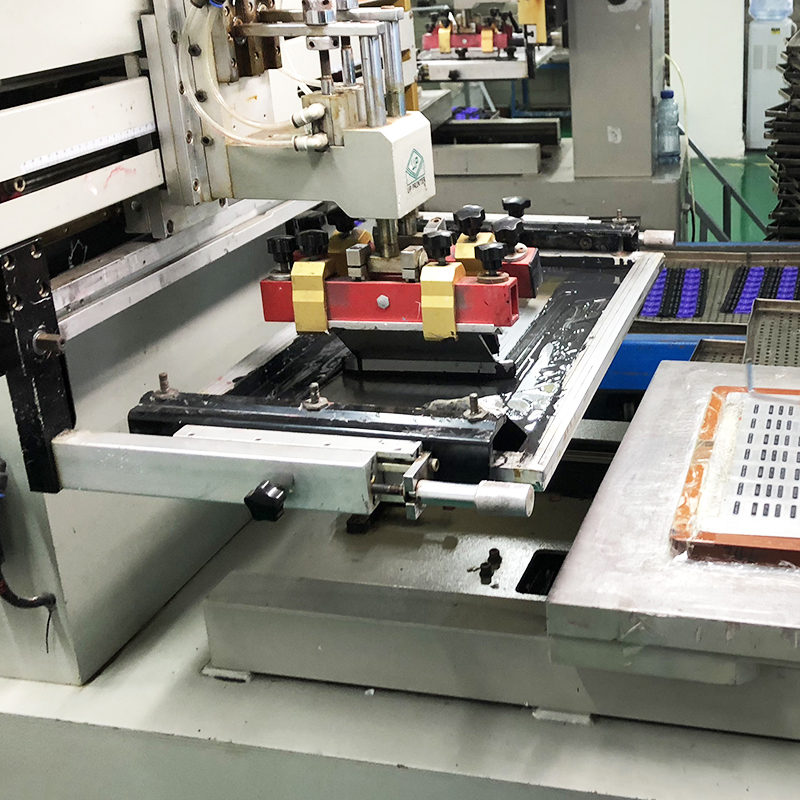
Screen printing lays ink on the key surface and is the standard for durable legends. Laser etching removes a layer of opaque paint to expose the translucent rubber underneath, and that exposed area is what lights up. That is why laser-etched legends read cleanly when backlit and why screen-printed legends alone do not.
We can light the whole keypad or only the characters. Whole-keypad backlighting suits panels where the operator needs to find keys in the dark; character-only backlighting suits panels where the function must be readable while the surrounding area stays dark.
After printing, a protective coating goes on the surface to keep the legend from wearing off under thumb traffic. That step is not cosmetic. It sets how many years the legend lasts, and it is where a cheap keypad shows its age first.
What Happens After You Send the File
Most delays on custom keypads come from information gaps, not manufacturing. Four steps from your file to a production mold.
You send the layout
A 3D file, or a physical sample if no drawing exists. Include key sizes, pitch, PCB pad drawing and annual volume.
We confirm the force
Our engineers return the force value for each key group and the webbing style that fits those travels.
Prototype tooling
Cut in 3 days to prove the force profile. If the sample comes back wrong, the change happens here, not on production steel.
Production tooling
12 days from approved drawing. Drawing review and engineering support are part of the quote, not a paid extra.
If you are comparing quotes and the spread looks unexplained, silicone keypad tooling explains what actually drives the difference.
Where These Keypads Are Used
Control Panels
Flat front panels with grouped function keys. Webbing thickness is set per key group so the most-used key is not the same weight as the numeric keys beside it.
Instrumentation and Meters
Small keys in dense layouts, where the 40–95 mm² force band applies and legend legibility under backlight matters more than key size.
Medical and Laboratory
Sealed surfaces that get wiped down. Contact type and coating are chosen for chemical exposure rather than for unit cost.
Household Appliances
Large function keys, usually with backlit legends, where the key has to read clearly across a kitchen.
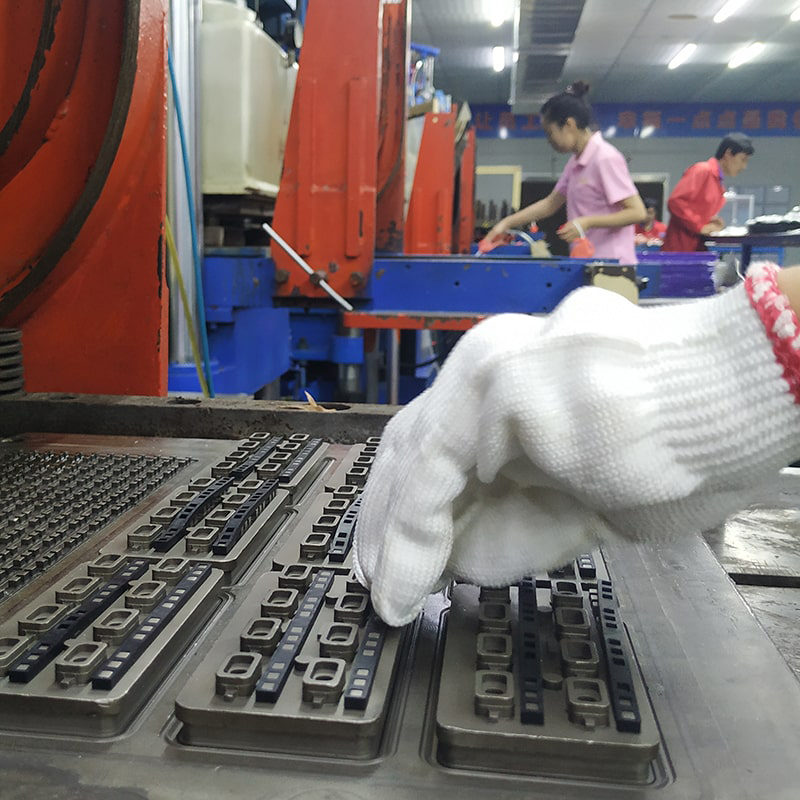
Loading preforms before molding
Each key group is loaded to the preform weight the tool was cut for. Weight drift is what makes one batch feel different from the last, so it is checked at the press rather than at final inspection.
When a Silicone Keypad Is Not the Best Fit
A silicone keypad is a good answer for most push button interfaces, and a poor one for the cases below. Saying so up front saves both sides a tooling cycle.
Very long stroke with mechanical feel
If your design needs a deep, mechanical click with a hard stop, silicone webbing will feel soft no matter how the wall is shaped. A metal snap dome under each key or a discrete mechanical switch serves that requirement better.
Very high keystroke counts
Silicone webbing fatigues. Where a single key has to survive well beyond a few million presses under continuous use, plan for replacement or choose a switch designed for that duty.
Tight dimensional tolerances across the whole part
Silicone shrinks during cure and the rate moves with part thickness. A keypad body is fine at the tolerances silicone holds, but a part that must also act as a precision locating component belongs in plastic or metal.
Deep multi-color backlighting
Silicone conducts light well enough to light legends, but separate colors per key need a light guide design, not laser etching alone.
Frequently Asked Questions
How much actuation force should I specify?
Match it to key area rather than picking one number: 80 g for keys around 40–95 mm², 100 g for 95–175 mm², 130 g for 175–350 mm², 170 g for 350–630 mm² and 210 g for 630–950 mm², each at ±15%. Send the layout and we confirm the force group by group.
What key travel is normal for a silicone keypad?
0.8–1.5 mm is the working window for conductive rubber contacts. Below roughly 0.8 mm the switch may not close cleanly on every press; above 1.5 mm the webbing has to be taller and the panel gets thicker.
Which webbing style gives the best tactile feel?
Cone gives the crispest snap and return. Dome gives a longer, softer press. Flat gives a light touch with almost no snap. Double Web gives progressive resistance over very long travel. Best depends on what the operator is judging, not on the shape alone.
Carbon pill or gold plated contacts?
Carbon pill for normal signal-level switching in control panels and appliances. Gold plated when the environment is aggressive or the current is above signal level. Gold on a clean indoor panel adds cost without adding life.
What is the minimum order?
1,000 pcs per batch for a custom-molded keypad. Prototype tooling takes 3 days and production tooling takes 12 days from approved drawing.
Can you mold from a sample instead of a drawing?
Yes. Send the physical part and its key dimensions. We reverse-engineer the tooling and confirm the force profile against your housing before cutting steel.
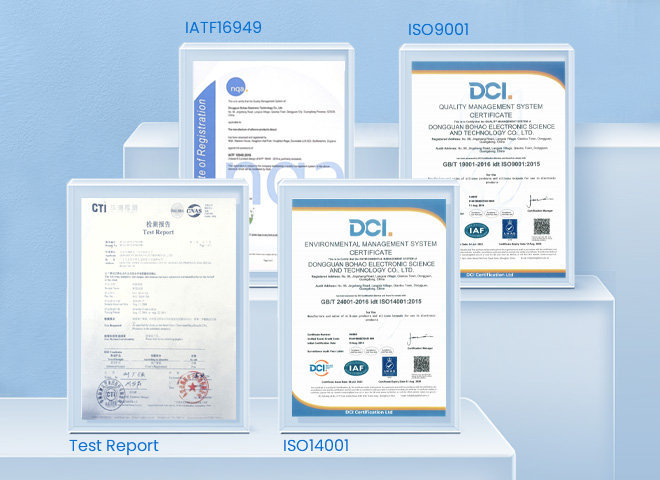
Certified manufacturing
These keypads are produced in factories certified to IATF 16949, ISO 9001 and ISO 14001. Certification documentation is available with the quote on request.
Engineering Review
Send Your Key Layout. We'll Tell You Where the Feel Fails.
Most keypad problems are decided before tooling and only discovered after sampling. Send the key sizes and the PCB pad layout. Our engineers come back with the force value for each key group, the webbing style that fits, the tooling cost and the lead time. All of that before any steel is cut.
- Free engineering review on your drawing or sample, no order obligation
- Quote within 3 hours of receiving your files
- NDA available on request
- Prototype tooling in 3 days, production tooling in 12 days
Prefer email? Send your drawing or a photo of the sample to karl@fromrubber.com and you will get the answer from the engineering team, not a sales sequence.
Content last updated: October 2026. Specifications are confirmed again with every quote. Mixed layouts, harder durometers and non-standard travel are reviewed case by case.
- 加载中···


Start Your Project Today!
- Phone
- *Title
- *Content
Sign Up Out Newletter
