Stair Climber Silicone Keypad Surface Finishes for High-Frequency Button Use
Ask for a surface finish on a stair climber silicone keypad and most briefs answer with one word: matte. That word is doing three jobs at once, and the three do not agree with each other. It sets how the panel looks under gym lighting, how the legends survive a thumb that lands on the same square centimetre thousands of times, and how much light gets through if the keys are backlit. Get one of those three wrong and the panel will look worn long before it stops working, which on a fitness console is the same as failing.
The thumb does not wear a key evenly, so do not specify the finish evenly
Wear on a stair climber silicone keypad is not distributed evenly across the keytop. It concentrates in a crescent where the ball of the thumb or the fingertip actually lands, which on a well-designed key is toward the lower third of the keytop and slightly to the side the operator's thumb approaches from. Everything outside that crescent can stay untouched for years while the crescent itself is polished, contaminated and abraded.
This matters because the standard finish tests are run over a nominal area, not over the crescent. An abrasion test that reports a good result across a keytop can still hide a failure at the patch where the operator touches. The practical response is to evaluate the finish at the contact patch: define where the thumb lands on the drawing, then treat that patch as the region of interest for any wear or adhesion test.
The busiest keys are the ones that show the finish decision
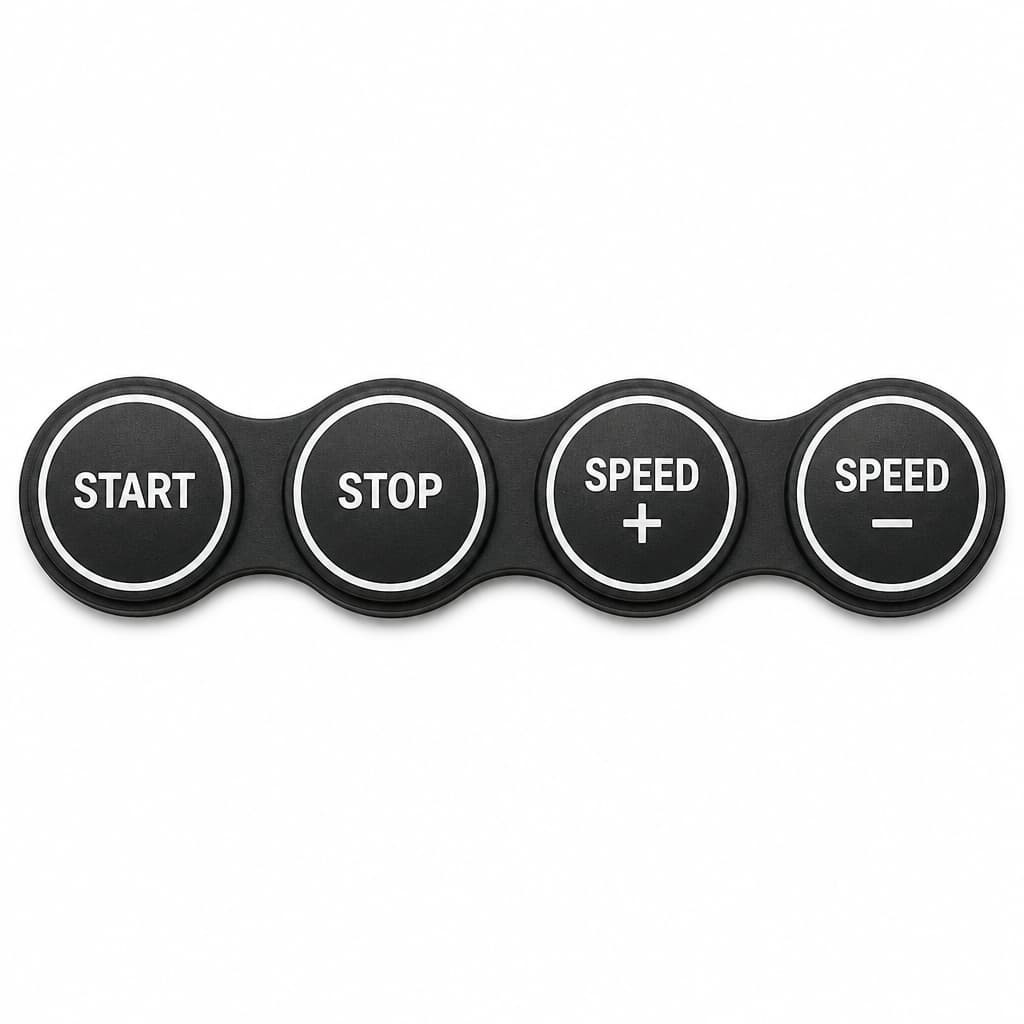
On a strip like this, the two speed keys take the overwhelming majority of presses, which means they are also the two keys that get wiped, greased, sprayed and polished the most often. A finish that looks acceptable on the START key after twelve months will be visibly different on the speed keys after the same period, and the operator reads that difference as a defect even when the legend is still legible.
This is the reason a finish should be qualified on the highest-traffic key rather than on a representative one. It is also the reason that a matte texture is not automatically the right answer: a matte surface hides fine scratches well but converts into a localised polish wherever it is repeatedly touched, and a localised polish on an otherwise matte panel is far more conspicuous than uniform gloss would be.
The three decisions hiding inside the word finish
Separating them makes the trade-offs visible, and it also makes the tooling conversation shorter, because one of the three is decided at the mould and cannot be changed later without a new texture.
- Mould texture. The pattern cut into the cavity. It is permanent for the life of that tool, so it is decided before the first shot, and it is the element that sets the base level of gloss and the depth of any stipple.
- Legend system. Screen printing, laser etching through a coloured top layer, or a sprayed and masked ink. This decides how the graphic itself behaves: printed ink sits on the surface and can be abraded away, while an etched legend is a change in surface level and wears by losing contrast rather than by disappearing.
- Top coat. A polyurethane or epoxy coating applied over the finished part. It is the usual way to buy abrasion resistance on a printed legend, and it is the element most often left off a first sample because it adds a process step.
Design guides for printed silicone keypads consistently describe the coating as the mechanism that provides an abrasion-resistant surface over a printed legend, and the same sources note that both printed and etched legends are commonly sealed afterwards. In other words the industry already treats the coating as part of the legend system, not as an optional cosmetic extra.
Where matte and backlight pull against each other
This is the trade-off that catches projects late, usually when the console gains illumination after the keypad texture has already been cut. A textured surface scatters light at the boundary. That is exactly what makes it look matte and what suppresses the specular reflection that would otherwise put a glare band across the console under a ceiling light. The same scattering reduces how much of the light from underneath reaches the operator's eye.
So a designer who wants both a fully matte panel and bright, evenly lit legends is asking for two things that the same surface cannot deliver equally well. There are workable compromises, and they are all structural rather than cosmetic: keep the texture on the field of the panel and leave the light windows smoother, use a light guide to distribute the illumination rather than relying on the keytop to pass it, or accept a slightly shallower texture on the backlit keys and keep the deeper stipple on the unlit areas.
Decide the illumination before the texture plate is cut. A texture change is a mould change. If there is any chance the console will be backlit in a later revision, the texture specification, the window geometry and the light path should be settled in the same review as the legend system, not in separate ones.
Unprinted surfaces are still finish-critical
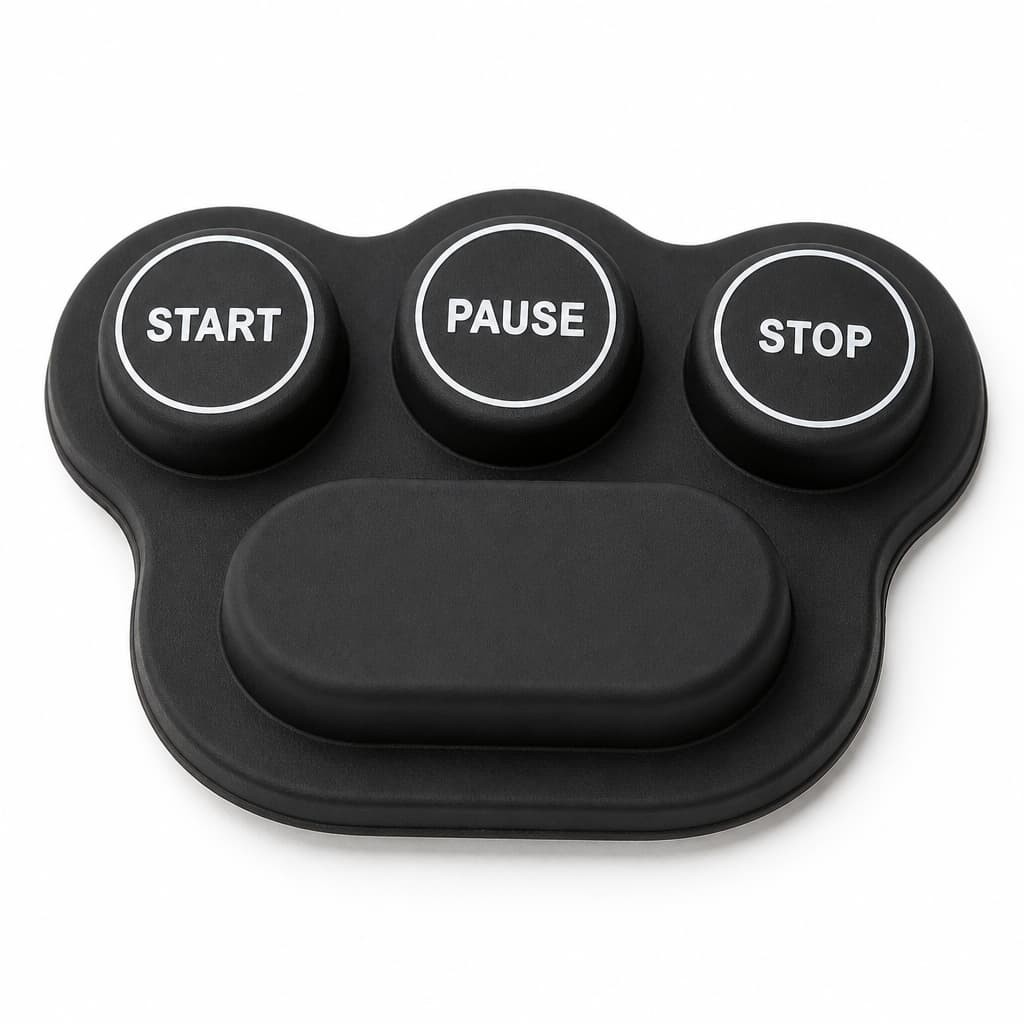
The large unprinted key in this panel has no legend to wear out, so it is tempting to treat it as finish-free. It is not. A silicone panel is moulded as one part, and any difference in surface appearance across that part will be read as a mark. If the printed keys are coated and the blank key is not, the two areas will age differently under the same wipe, and the boundary between them will start to show.
The rule is simple: whatever finish regime is chosen has to be applied to the whole part, including the areas with nothing printed on them. This is also where a matte texture earns its keep, because a uniform stipple is far more forgiving of the small variations that appear when two areas of the same moulding are handled differently in secondary operations.
What the panel is actually exposed to in a gym
Industrial keypads are usually specified against solvents and oils. A fitness console is exposed to something different, and the difference changes which finish survives. The dominant chemistry on a stair climber silicone keypad is aqueous and slightly saline: sweat, hand sanitiser, and whatever hand lotion was on the operator's hands, applied by a palm that is also mechanically abrading the surface. That combination is harder on a printed surface than a single chemical exposure would be, because the liquid softens the boundary layer while the hand works at it.
Two test families are worth naming on a specification. Abrasion resistance is measured with an abrasion tester, and the ISO 4649 rotating cylindrical drum method is the reference that the stairclimber safety standard itself lists among its normative documents, which tells you the machinery-equipment world already treats abrasion as a measurable, safety-adjacent property rather than a cosmetic one. Adhesion of the ink or coat is checked by a cross-hatch and tape method, which is more useful than a visual inspection because it finds the legend that is about to fail rather than the one that already has.
There is a third property that rarely appears on a keypad drawing and probably should: gloss retention. Because the operator's eye uses a change in sheen as the cue that the panel is dirty or worn, the first visible sign of wear on a matte panel is a change in gloss, not a change in the legend. A simple measured gloss reading taken at the contact patch before and after a wear cycle turns that cue into a number.
When nothing is printed, the finish is the whole specification
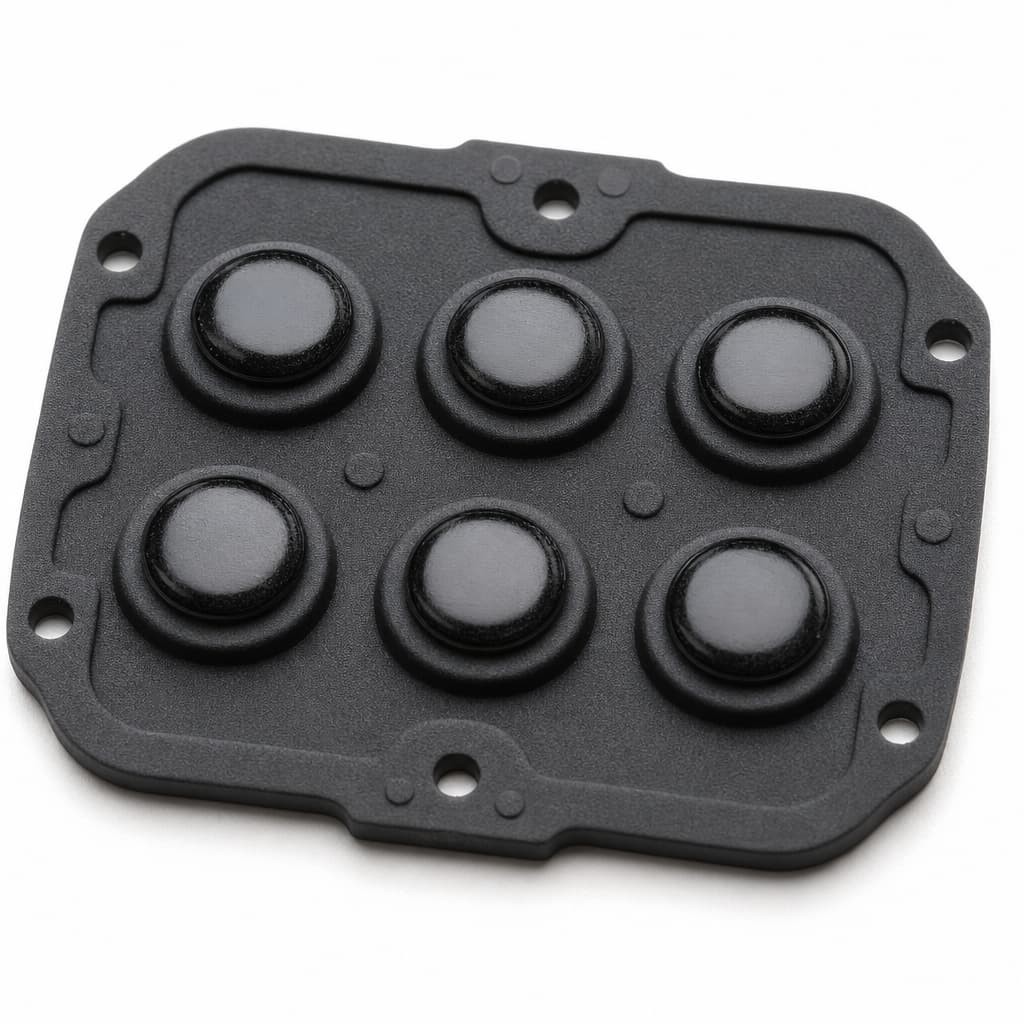
An unprinted pad like this has no ink to protect and no window to light, so the finish decision collapses into a single question: how does the surface behave when it is touched and wiped for years. On a part like this, the mould texture is doing all of the work, which makes it the item worth getting right at tooling, because there will be no coating or legend layer to compensate later.
The flange and the mounting holes in this part add a second consideration. Any texture on the sealing flange becomes part of the seal, and a deep stipple across a flange that is meant to compress into a groove changes the preload the assembly sees. On a pad of this type the finish is not only cosmetic, it is part of the mechanical interface.
What goes wrong most often with finishes on a high-traffic console
- The legend system is chosen for print quality on a sample, without a coating, and the first production panels fail at the thumb crescent within the first year.
- A deep stipple is cut into the mould for cosmetic reasons, then a backlit version of the same console cannot pass enough light and the tool has to be re-textured.
- The finish is applied to the printed keys only, so the blank areas on the same moulding age differently and the panel looks stained.
- Gloss is specified as a look rather than as a number, so the first sample and the production part are both called matte while measuring differently.
- Wear testing is run over the whole keytop, which dilutes the result and hides the contact patch where the failure will actually start.
Case: the speed keys that polished before the legends wore
Symptom. Panels on a compact stair climber console were returned after roughly eight months in service because the two speed keys looked shiny and dirty while the rest of the panel still matched the original sample. Gym staff had begun replacing panels over appearance, not function, and every replaced panel still actuated correctly.
Measurement. The returned parts were examined under raking light rather than straight on. The glossy crescent sat exactly where the thumb landed, and the gloss reading at that patch was several times the reading at the edge of the same key. Ink adhesion at the patch was still acceptable, and the etched areas had lost contrast but not depth. The matt stipple outside the crescent was intact.
Root cause. The panel had been specified as matte with a screen-printed legend and no top coat, and the mould texture was a shallow stipple chosen for appearance. The shallow texture polished out quickly at the contact patch, so the first visible sign of wear was a change in gloss rather than a legend failure. Because the finish had been qualified on the whole keytop rather than the patch, the sample test had reported a satisfactory result.
Fix. The legend was moved to laser etching with a coated finish for the two high-traffic keys, and a defined compression groove was added to the flange while the tool was open. The shallow stipple was kept on the panel field so the console still matched the original industrial design, which mattered more to the customer than uniformity of wear.
What it suggests. On a high-frequency console, appearance failure arrives before function failure, and appearance failure is governed by the finish specification at the contact patch. Testing the whole keytop measures the part that nobody touches.
FAQ
Is laser etching always more durable than screen printing on a silicone keypad?
For legend retention under repeated contact, etched legends generally hold their contrast longer because the graphic is a change in surface level rather than a layer sitting on top of it. The exception is a printed legend underneath a proper top coat, which can perform very well and keeps colour options that etching cannot produce. The decision is usually made by the colour requirement as much as by the wear requirement.
Does a matte finish reduce how bright a backlit keypad looks?
Yes. Texture scatters light, which is what makes the surface look matte and what also reduces the light that reaches the eye. The usual answer is to keep the texture on the panel field and let a light guide carry the illumination to smoother windows, rather than trying to get both maximum texture and maximum brightness from the same surface.
Can the finish be changed on an existing tool?
The mould texture can be changed, but it means re-cutting or re-etching the cavity, which is a tooling event rather than a process adjustment. Legend method and top coat can be changed without touching the tool at all, so it is worth being certain about the texture before the cavity is finished.
Conclusion
Surface finish on a stair climber silicone keypad is where appearance, wear and illumination meet, and the three do not want the same surface. Split the decision into mould texture, legend system and top coat, qualify it at the patch of the keytop the thumb actually lands on, and settle the backlight question before the texture is cut, and the panel will still look like the sample long after the legends have taken several hundred thousand presses. FromRubber moulds custom silicone keypads with moulded textures, printed or laser-etched legends and coated finishes for fitness and industrial equipment, and reviews finish and wear performance against the customer's use pattern before tooling is cut.
This article was written by the moulding engineering team at FromRubber, a custom silicone keypad and button manufacturer in Dongguan, China. We mould control panels for fitness, medical and industrial equipment. The finish and wear checks described here are the ones we run on our own shop floor before a panel is released to production.
Related reading
Sources
- [1] Silicone.com.hk, Laser etching vs screen printing on silicone keypads — legend durability, abrasion and environment resistance. https://www.silicone.com.hk/en/silicone-keypad-laser-etching-silkscreen-printing/
- [2] Silicone Factories, Silicone screen printing vs laser etching for HMI keypads — RCA wear testing and matte polyurethane top coats. https://www.siliconefactories.com/silicone-screen-printing-vs-laser-etching-keypads/
- [3] Silicone Keypad Factory, Laser etching for silicone keypads — abrasion resistance of etched legends under frequent user contact. https://siliconekeypadfactory.com/laser-etching/
- [4] Simcone, Laser etching silicone rubber keypad — polyurethane or epoxy sealing to provide an abrasion-resistant surface over printed legends. https://simcone.com/services/laser-etching/
- [5] ISO 4649, Rubber, vulcanized or thermoplastic — Determination of abrasion resistance using a rotating cylindrical drum device, ISO standard record; the edition referenced by ISO 20957-8:2017 is ISO 4649:2010 (https://www.iso.org/obp/ui#iso:std:iso:4649:ed-3:en). https://www.iso.org/standard/70325.html
- [6] ISO 20957-8:2017, Stationary training equipment — Part 8: Steppers, stairclimbers and climbers, normative references and friction testing. https://cdn.standards.iteh.ai/samples/70975/0fab6016375c465282ea8d5b8d3ea2fc/ISO-20957-8-2017.pdf
- [7] JASPER, Laser-etched silicone keypad legend guide — controlled colour layers, coating adhesion, day-and-night checks, wear testing and cleaner resistance. https://www.jasperele.com/blog/laser-etched-silicone-keypad-legends-coatings/
- [8] FromRubber, Friction wear on silicone keypad legends after repeated glove use. https://www.fromrubber.com/blog/Friction-Wear-on-Silicone-Keypad-Legends-After-Repeated-Glove-Use_b32000
- [9] FromRubber, Laser etching capability for silicone rubber keypads. https://www.fromrubber.com/comm20/Laser-Etching.htm