
Custom Silicone Gaskets for Waterproof Electronic Enclosures: Design Requirements and Sealing Issues
Most waterproof electronic enclosures are not designed badly. They are designed in separate files. The housing is one part, the cover is another, the PCB has its own mounting height, and the gasket is drawn last, to fill whatever gap is left over. That is how a unit passes a bench test on a Tuesday and comes back wet from a container in November. Nothing in that stack was ever checked as a stack.
Silicone usually gets blamed first, because it is the cheapest part to change. The sequence is familiar: the seal leaks, the gasket gets thicker, it still leaks, the compound gets softer, the cover stops sitting flush, someone adds adhesive backing, and the leak moves from the long side to a corner. Every one of those steps treats the gasket as an independent component. None of them touches the reason the contact pressure was never even to begin with.
A custom silicone gasket for an electronic enclosure is a spring, not a washer. It only seals where it is compressed enough to close the surface it sits on, and it only stays sealed where that compression is repeated along the whole perimeter. The moment you read it that way, the questions change. Instead of asking which hardness is best, you ask how much the cover actually deflects between screws. Instead of asking whether silicone is waterproof, you ask whether the section can still recover after two years of being squashed.
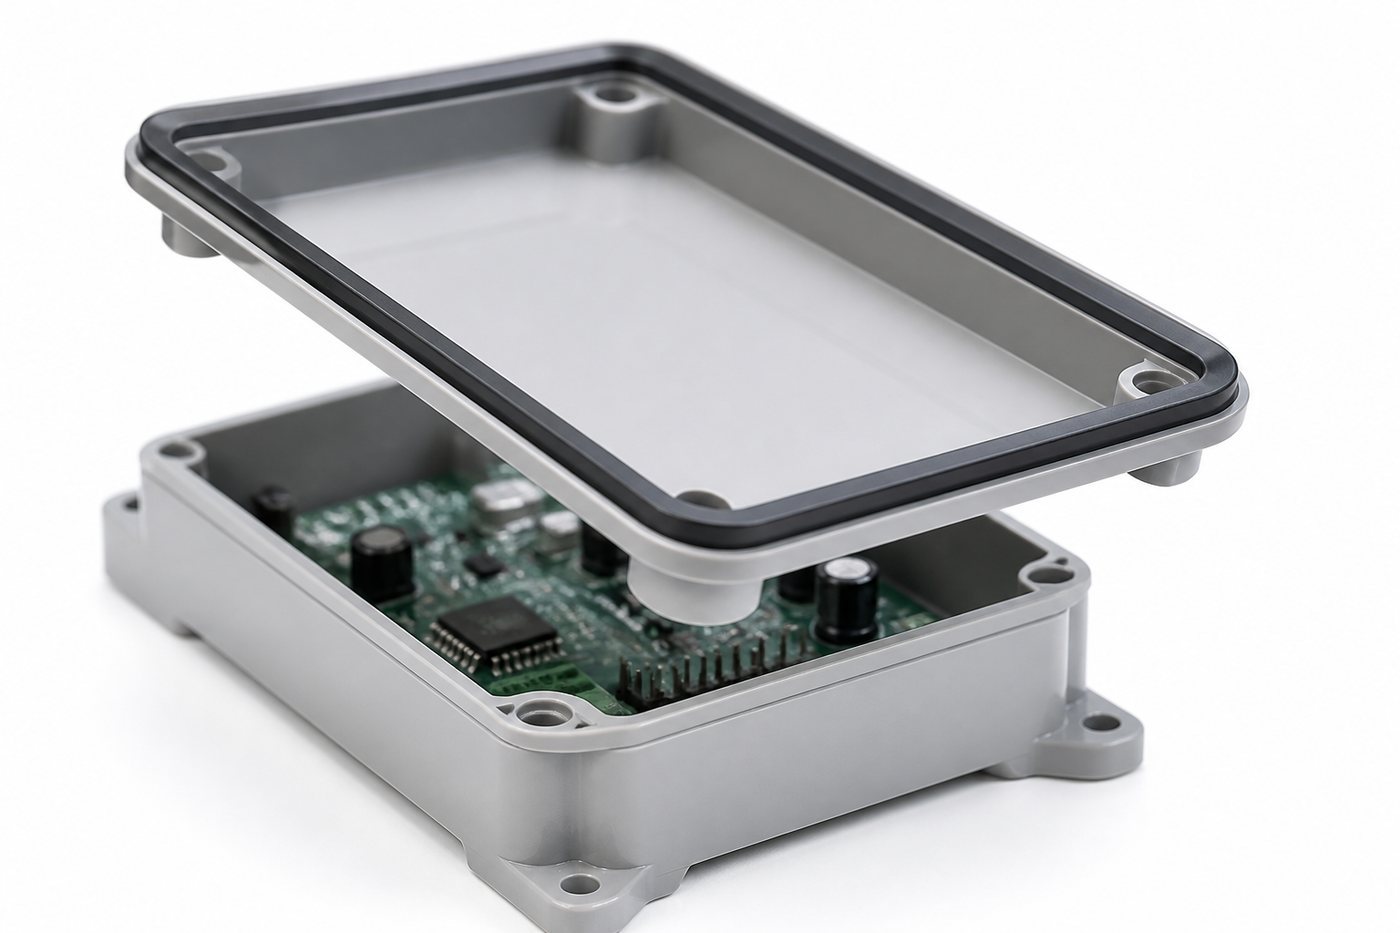
The photograph opposite shows the arrangement we get asked about most: a moulded gasket carried on the cover rim, closing onto a housing flange, with the electronics sitting well below the sealing line. It looks simple. Almost all of the difficulty is in the two surfaces either side of that black loop.
Where electronic enclosure gaskets actually fail
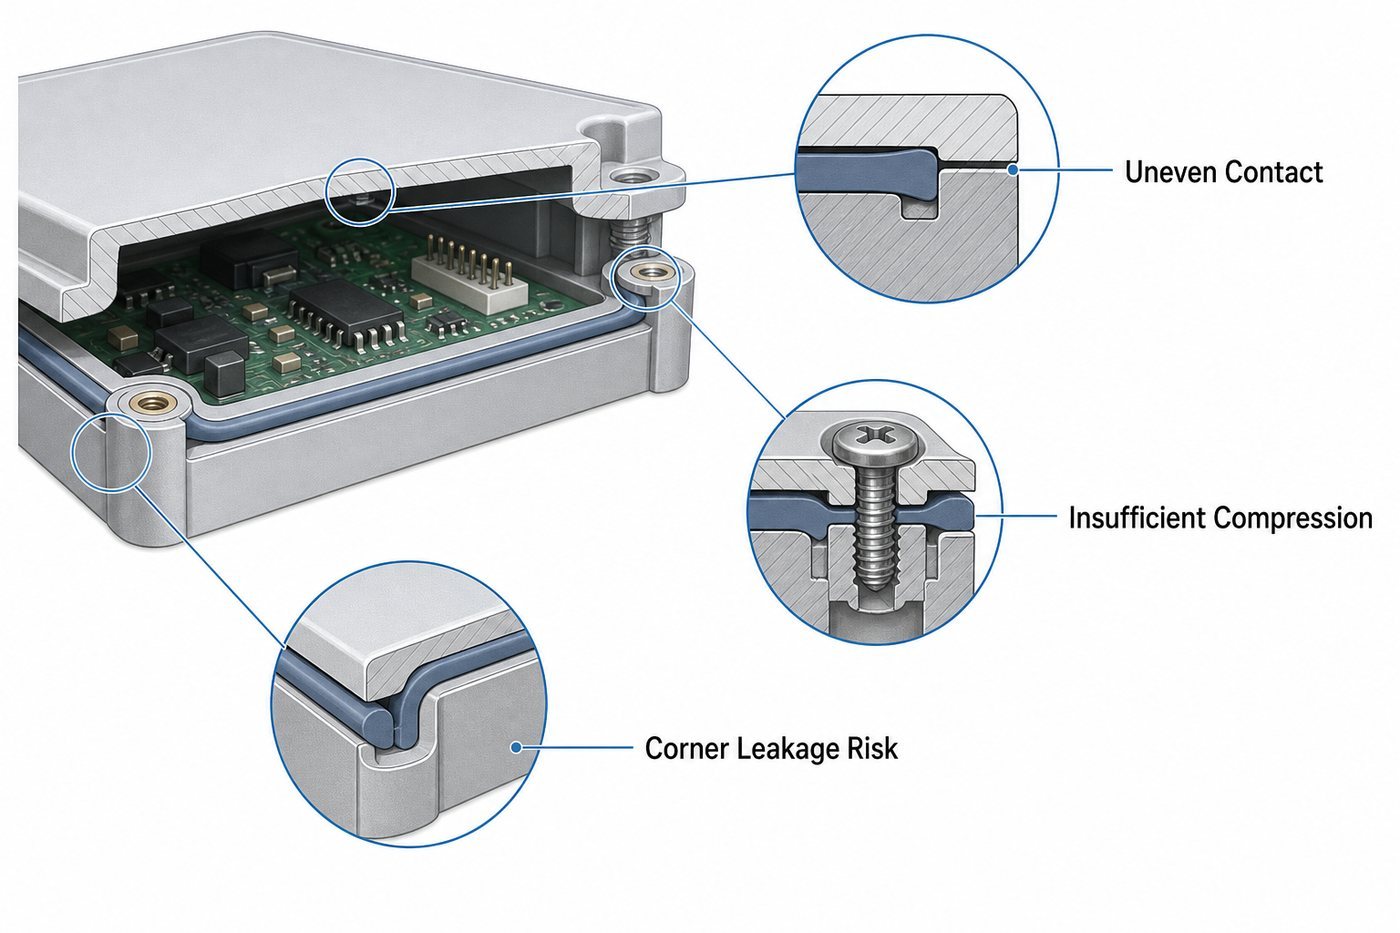
Leaks rarely appear where the drawing suggests they should. In enclosure work we see the same three locations over and over, and none of them is a material problem in the first instance.
On a rectangular cover held by four screws, the cover bows. The moulded-in warp from the injection tool, plus the clamping pattern, means the middle of the long side lifts by a fraction of a millimetre while the corners are pulled down hard. The gasket follows the cover, so its contact width collapses over the middle third of that side. Water does not need a hole. It needs a length of seal that is touching but not pressed.
The same geometry explains why re-torquing screws sometimes makes a leak worse: the fourth screw pulls the cover flatter in one place and lifts it somewhere else, and the leak relocates.
The cover-to-housing joint is a flatness problem before it is a gasket problem
Two moulded or machined surfaces never meet perfectly. They meet within a tolerance, and that tolerance is what the gasket has to absorb. If the flange has a 0.2 mm step at the parting line of the housing tool, the gasket sees 0.2 mm less compression along that line no matter what compound you specify. Checking flatness with a straight edge and a feeler gauge before choosing a gasket section is not over-engineering; it is the only way to know what the section has to do.
Screw bosses and corners change the compression map
A screw does not compress a gasket evenly, it compresses a circle around itself. Boss height tolerance, thread engagement and the stiffness of the cover material all decide how much of that force reaches the gasket at each fastener. Between two screws the cover is in bending, so the section is only partly loaded. The result is a compression map with peaks at the fasteners and troughs between them, and the troughs are where the water goes. Corner transitions add a second effect: a section bent around a tight radius is thinner on the outside of the bend and wrinkled on the inside, so the corner is usually the least reliable part of an otherwise good seal.
A gasket that moves during assembly cannot seal where you designed it
Silicone has a low surface friction compared with most plastics, which is useful in a groove and unhelpful on a flat flange. A flat gasket with no locating feature can be dragged out of position as the cover slides into place, and by the time the screws are tight it is 1 mm off the sealing land. Thin sections are worse: they can roll into the gap instead of sitting on it. If the assembly operator cannot feel the gasket seat, the design is relying on luck. A shallow groove, a few moulded location pins, or a small step in the housing costs almost nothing at tooling stage and removes the variable entirely.
What design factors move a waterproof silicone gasket's performance
Once the enclosure is treated as part of the seal, the gasket design becomes a short list of decisions that can be argued about with numbers instead of adjectives.
Cross-section and contact width
A flat die-cut gasket, a moulded rectangular section and a moulded section with a raised sealing lip behave differently under the same cover. The lip concentrates the closing force onto a narrow band, so it seals at a lower screw torque, but it is also less forgiving of lateral misalignment. A flat section spreads the same force over a wider area, which tolerates a rougher flange and a sliding cover, at the cost of needing more force to reach the same unit pressure. Neither is better in general. The choice follows from how the cover closes and how flat the flange really is.
Contact width is the variable most often left to chance. Too narrow, and the seal depends on the flange being cleaner and flatter than it will be in production. Too wide, and a flexible cover simply bridges the gasket instead of compressing it, which looks correct on a section drawing and leaks in a rain test.
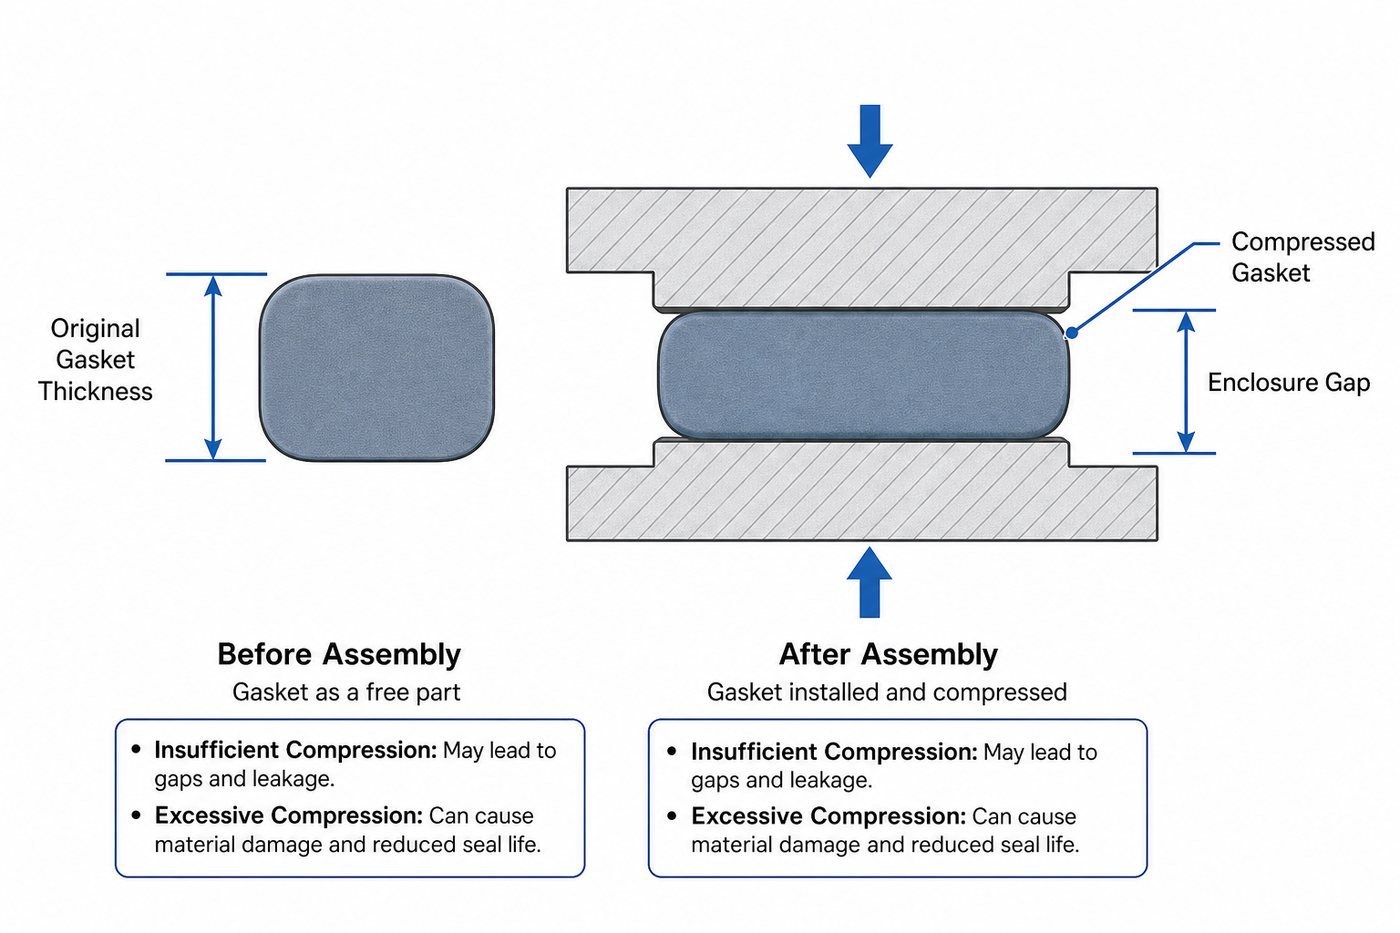
Compression should be treated as a window rather than a target. The lower edge is the minimum squeeze that closes the surface and holds it closed through thermal cycling. The upper edge is the point where the cover stops seating, the screws strip the boss, or the rubber takes a permanent set and stops pushing back. That window has to be calculated against the real gap range, which means stacking the tolerances that actually exist: cover flatness, boss height, housing flange height, and gasket thickness.
Compression and enclosure gap tolerance
If the nominal gap is 1.0 mm and the combined tolerance is plus or minus 0.25 mm, a 1.3 mm gasket will be over-compressed on a small-gap unit and barely touched on a large-gap one. That is the arithmetic behind a product that seals on the first moulding trial and fails on the tenth production lot. The gasket thickness tolerance and the housing tolerance have to be chosen together; specifying a tight gasket and a loose housing just moves the cost.
Corner geometry and continuous sealing paths
Rectangular enclosures force the gasket path to turn four times. Where the turn is tight relative to the section, the outside of the bend stretches thin and the inside compresses into a fold. Both reduce the sealing pressure exactly where two straight runs meet. Moulding the corner into the part, or designing a corner radius the section can follow without folding, does more for a waterproof result than a harder compound. If your supplier is die-cutting a flat sheet to a rectangle and calling it a custom gasket, the corners are the first thing to question.
| Section type | Closing force needed | Tolerance to misalignment | Best fit |
|---|---|---|---|
| Flat die-cut | Higher | Good laterally, poor on rough flanges | Simple covers, low volume, wide flanges |
| Moulded rectangular | Medium | Good | Grooved housings, repeatable assembly |
| Moulded lip or bulb | Lower | Poor laterally, good on uneven faces | Thin covers, low screw torque, tight gaps |
| Sponge profile | Lowest | Good on gaps, weak against extrusion | Dust and splash protection, large gaps |
Choosing silicone for an enclosure seal
Material selection is where most specification documents go quiet and start repeating the compound supplier's data sheet. Three properties actually decide the outcome, and none of them can be settled without the enclosure in front of you.
Hardness and how the cover behaves
Hardness sets the force needed to deform the section, so it has to match the closing method. A screw-clamped cover can load a firmer compound; a snap-fit or a hinged door usually cannot, and a firm gasket there will simply hold the cover open by a few tenths. As a starting point for hand-closed and light screw-closed enclosures, sections in the soft-to-medium band are common, and screw-clamped industrial covers often go one step firmer, but the number that matters is the one your cover can actually deliver at the worst-case gap. Soft compounds conform better and also flow into gaps under pressure, which is how a gasket ends up with a nibbled edge and a permanent flat.
Environment: what the section has to survive
Silicone handles heat, cold, UV and ozone better than most general-purpose rubbers, which is why it dominates outdoor and thermal enclosure work. Its weak point is hydrocarbon contact. If the enclosure sits near oil mist, fuel vapour, or certain industrial coolants, silicone can swell and lose strength, and a nitrile or fluoroelastomer seal may be the honest answer even though silicone is the easier moulding job. Outdoor units also see thermal cycling that pumps the cover in and out; the gasket has to keep pushing back after a thousand of those cycles, which is a compression set question rather than a hardness question.
Solid or sponge silicone
Sponge closes a large or uneven gap at very low force, which makes it attractive for dust and splash covers and for housings that are not stiff. It is not structural, it takes set more readily, and once the skin is broken it can hold water. Solid silicone supports its own shape, resists extrusion into a gap, and gives a predictable compression curve, which is why most IP-rated electronic enclosures use a solid moulded section in a groove. If the gap is genuinely large and the cover is weak, sponge is not a compromise; it is the correct choice. If the cover is stiff and the gap is controlled, sponge is usually a way of hiding a tolerance problem.
One clarification worth putting in writing for any project: silicone being water-resistant does not make a gasket automatically suitable for drinking water contact or for food-adjacent use. Those claims depend on the specific compound, its cure system and the testing required by the destination market, and they have to be confirmed against the actual material certificate rather than assumed from the base polymer.
What to check before the mould is cut
Tooling is the point where a design stops being adjustable. Everything below is cheaper to settle before cavity one than after.
Dimensions, and which tolerances actually matter
Overall length and width matter for fit. Thickness matters for sealing, and it is the dimension that should never be pushed into a loose tolerance class just because the drawing has a general note. Corner radii and the cross-section profile determine whether the gasket folds, wrinkles or seats. General moulded rubber tolerance grades, such as those in ISO 3302-1, are a reasonable default for non-critical features, but the sealing thickness and the groove fit usually deserve a callout of their own.
Enclosure samples, not just drawings
A drawing tells you the nominal gap. A sample tells you what the cover does when it is screwed down. Assembling a prototype gasket onto the real housing and checking where it is actually touching is the fastest way to find the weak span, and it is far cheaper than a leak test that only tells you it failed. A strip of pressure-sensitive film, or a thin shim pulled out from under the cover at several points, is enough to see the compression map without instrumentation.
Mould structure and run-to-run consistency
Flash on a sealing face is a leak path, so the parting line has to be placed away from the contact band, and that decision belongs in the tool design rather than in a trimming operation afterwards. Cavity count affects how evenly the compound fills and how consistently thickness repeats across a batch. For a gasket, thickness consistency matters more than most of the other dimensions on the drawing, because it is the dimension that sets compression on every unit.
A short checklist before you request a quotation
- Measured gap between the two sealing faces, at the screws and at mid-span, not only the nominal from the model.
- Flatness of both faces, with the direction of any step or warp noted.
- The compression window you can accept, expressed as a minimum and a maximum rather than a single target.
- How the cover closes, and how much force the closing method can deliver.
- Whether the gasket needs a groove, pins or a step to stay in place during assembly.
- Operating temperature range, contact media, and whether the unit is exposed to sunlight or washdown.
- Which ingress protection level the finished unit has to demonstrate, and how it will be tested.
How a custom gasket project runs at FromRubber
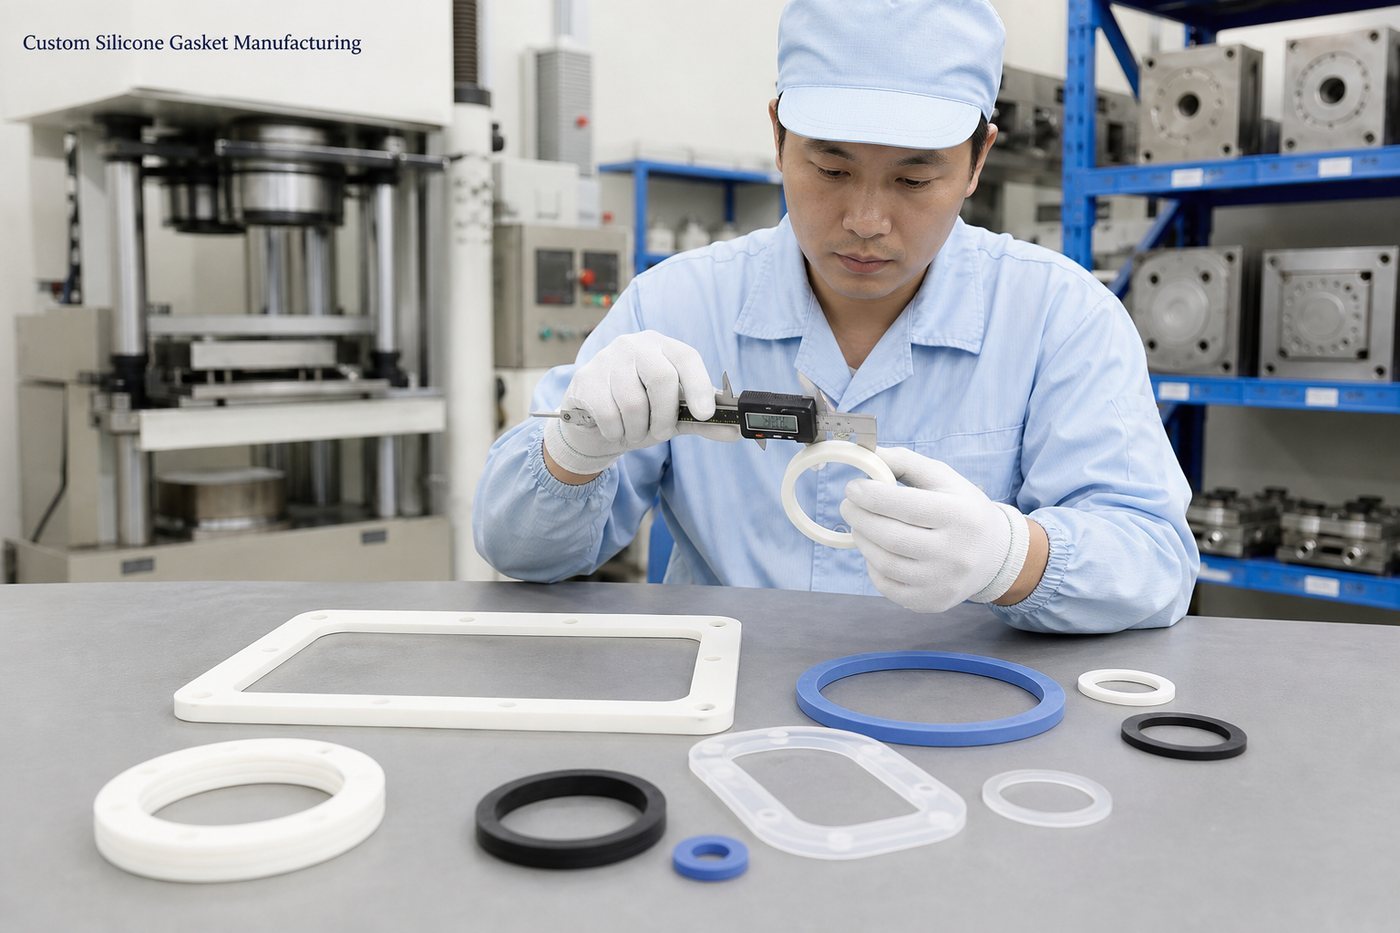
FromRubber is a silicone and plastic parts manufacturer in Dongguan, working from customer drawings and physical samples rather than from a catalogue. Enclosure gasket projects usually start with a drawing review and a conversation about the closing method, because that is where the compression window gets decided. Tooling is built in-house, which means a change to the corner radius or the lip profile can be tested on a sample before the production tool is committed.
Production runs on 32 compression moulding machines, 30 vacuum hydraulic presses and 2 flat-bed presses, across two plants, with dimensional inspection at the press and again before packing. The company has operated since 2010 and is certified to IATF 16949:2016, ISO 9001:2015 and ISO 14001:2015. Sample tooling usually takes 3 to 5 working days and production tooling 10 to 12 working days, which is what makes it practical to check a section change against a real housing before the production tool is cut. Custom gasket and seal work sits in the custom silicone seals range. For buyers who need a second opinion on a section that has already failed a leak test, an engineering review of the drawing and a housing sample is the usual starting point.
If you have a housing that leaks and a drawing that looks correct, the useful next step is not a new compound. Send the gap measurements, the cover closing method and one housing sample, and we will tell you whether the section has a compression window at all. Drawings, samples and questions can go through the inquiry page, or directly by WhatsApp and WeChat on +86 18676210913.
Questions that come up before an order
Can I just make the gasket thicker to stop the leak?
Sometimes, temporarily. Thicker adds compression where the gap is already small, which can lift the cover, overload the screws and push the section into a permanent set. If the leak is at mid-span on a long side, the cause is cover deflection, and thickness will not fix a span that is bending away from the seal.
Is a flat die-cut gasket good enough for a waterproof enclosure?
For a stiff, flat, well-supported flange with a wide sealing land, it can be. For a moulded plastic cover with warp and a narrow land, the corner behaviour and the lack of locating features usually show up as inconsistent results between units. It is a fit question, not a quality question.
Should the gasket sit in a groove or on a flat face?
A groove controls position and limits how far the rubber can spread, which makes compression more repeatable. A flat face is simpler to tool but relies on friction and operator care to stay in place. For automated or high-volume assembly, the groove or a locating feature is usually worth the tooling change. There is more on positioning in this note on gasket movement during assembly.
What hardness should I specify?
Start from the closing force and the gap, then pick the hardness that fits inside those limits. If you specify hardness first, you are choosing the answer before you know the question. The trade-offs between soft and firm compounds are covered in our Shore hardness selection note.
How do I know the gasket will still seal after two years outdoors?
Look at compression set under the real temperature and compression, not only at the initial hardness. A gasket that takes a set stops pushing back, and the cover does not move to follow it. UV and ozone resistance are usually the easy part for silicone; recovery after long compression is the part that decides service life.
Waterproofing an electronic enclosure is decided long before anyone chooses a compound. It is decided by how flat the two faces are, how the cover is held down, how far the section is allowed to compress, and whether the gasket can stay where it was put. Silicone is very good at being a spring. It is not able to be a correction for a housing that does not close evenly.
If you are at the drawing stage, the most useful thing you can prepare is not a specification sheet. It is the measured gap at the worst point, the closing force available, and one assembled housing. Those three items turn a gasket discussion into an engineering one.