What Causes Silicone Gaskets to Shift During Assembly? How to Improve Positioning and Fit
The gasket is placed in the housing, the cover comes down, four screws go in, and the unit fails leak test. Take the cover off and the gasket is no longer where it was put. It has rolled onto its side, or slid half a millimetre toward one corner, or folded under the cover in a place nobody looked at during assembly.
What makes this frustrating is that the gasket itself is usually within tolerance. The housing is within tolerance. The screws are correct and the torque is correct. The failure came from the short period between placing the gasket and tightening the last screw, when nothing was holding it and something pushed it.
Positioning problems on silicone gaskets — the part of silicone gasket positioning that drawings almost never define — are rarely caused by bad parts. They are caused by a design that gives the seal no constraint in the direction the assembly moves. This article looks at where that movement comes from and which structural changes actually stop it.
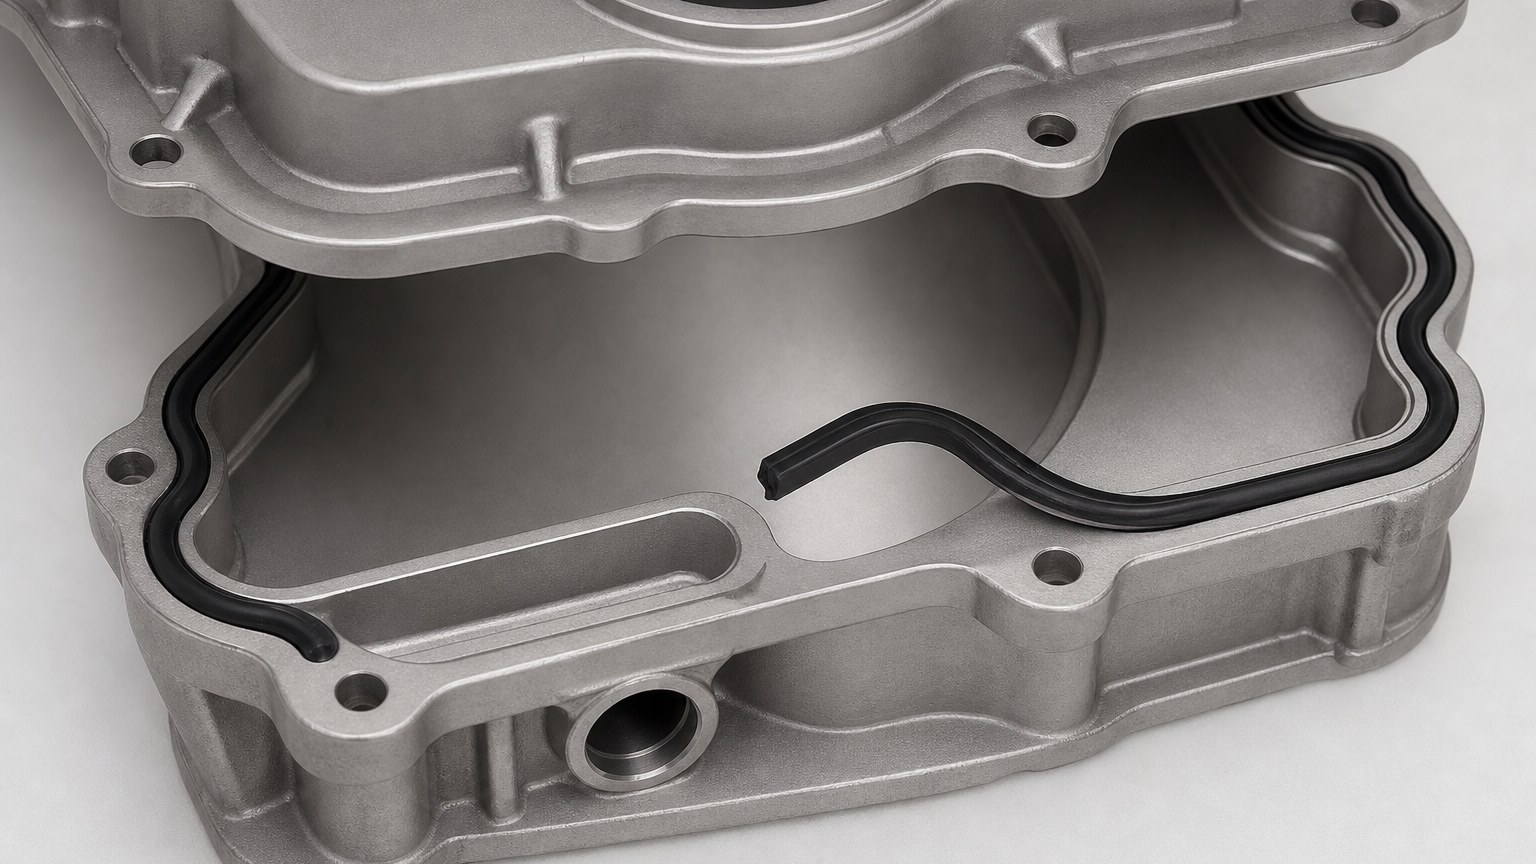
Below is the failure in its most common form. The gasket is seated around most of the perimeter, but one section has lifted out of its groove and is sitting on the sealing land instead of inside it. When the cover is tightened, that section is compressed against the wrong surface and the seal path is broken at exactly that point.
Nothing here is defective. The part that moved simply had somewhere to go.
Why a gasket moves before the screws are tight
A gasket stays in place for one of three reasons: it is constrained by geometry, it is held by friction, or it is held by adhesion. During assembly, all three are weak. Geometry is weak because the gasket sits loose in a pocket that is bigger than it is. Friction is weak because silicone is slippery against machined metal and the contact pressure is near zero until the joint closes. Adhesion is absent unless the part was specified with tape, which many gaskets are not.
Nothing constrains it in the vertical direction
A groove that is deeper than the gasket thickness, or a ledge with no side walls, gives the gasket freedom to move up and out. That freedom is harmless in a horizontal joint that closes evenly. It becomes a problem the moment the cover touches one edge first, because the gasket is pushed sideways and upward into the free space.
Soft material behaves like a mechanism
A 40 Shore A silicone gasket with a 1.5 mm section is not a rigid plate. Under a small lateral push it bends, rolls, and can buckle into a wave along its length. The thinner and softer the section, the more it behaves like a rope than a seal. That is convenient for conforming to a curved surface and inconvenient for staying put during handling.
Hardness changes this more than most design reviews acknowledge. The same gasket at 60 Shore A resists rolling noticeably better than at 40 Shore A, at the cost of needing more force to conform to surface variation. The right number depends on which problem is worse in that particular joint.
The cover drags before it lands
Most covers do not descend vertically. They are tilted in by hand, slid along a register, or rotated around a hinge. Every one of those motions applies a horizontal component to the gasket before any compression exists. If the gasket has a locating feature, that force is carried by the feature. If it does not, the force is carried by friction, and friction loses.
The same thing happens with automated assembly, only faster. A pick-and-place head that releases the gasket a fraction of a millimetre off-centre creates a preload in one direction that the first screw then amplifies.
Three ways a gasket leaves its position
Not all displacement looks the same, and the fix differs. The table below is the one we use when a customer sends photos of a failed assembly.
| What happens | What you see after opening | Usual cause | First change to try |
|---|---|---|---|
| Slide | Gasket intact but offset toward one side; contact marks uneven | Pocket larger than gasket; no lateral stop | Reduce pocket clearance or add a locating point |
| Roll | Gasket on its edge, section twisted | Thin section, soft compound, cover dragged across it | Constrain the section in a groove or raise hardness |
| Fold | Crease or trapped loop under the cover | Gasket longer than the path, or pushed by the cover during closing | Shorten the perimeter length; change assembly direction |
The fold case is the one that gets misdiagnosed most often. A gasket that is a few tenths of a millimetre long around a long perimeter has nowhere to put the excess material, so it buckles. It is not a moulding defect; it is a length-to-path mismatch that only appears when the part is installed.
Which locating features are worth the tooling cost
Adding features to a gasket costs money in the tool and can cost time in production, so each one should be justified by the motion it prevents.
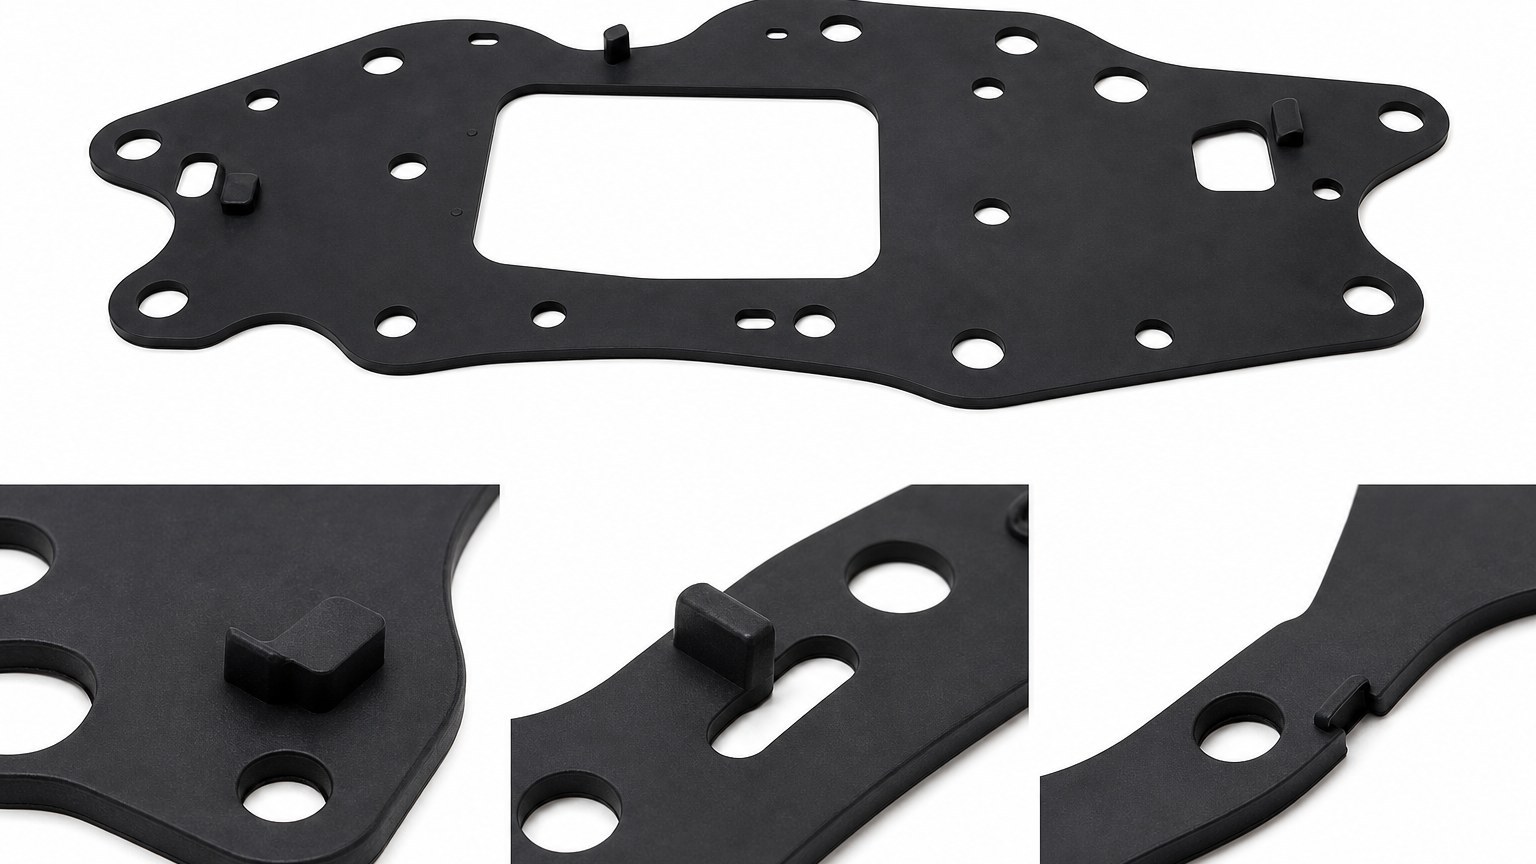
Through-holes around the fasteners are the cheapest locating feature because the bolts already exist. They stop the gasket sliding, and they stop it rotating around a single fixing. They do not stop it lifting, so they work best combined with a groove or with tape.
Moulded tabs are more effective but need clearance in the housing, and they add flash lines that have to be trimmed. On thin sections, a tab can become the weakest point of the part.
Holes on the fasteners
A gasket with holes at the bolt positions cannot slide once the bolts are through it. The catch is tolerance: the hole positions carry the same ISO 3302-1 tolerance band as the rest of the part, and the housing carries its own. If the two tolerance stacks oppose each other, the gasket will fit on one housing and not on the next. Oversizing the holes solves the fit and gives back some of the movement, so the hole diameter is a compromise rather than a free feature.
Slots and tabs
A slot allows movement in one direction and blocks it in the other, which is often exactly what a joint needs: free to expand with temperature, but unable to slide off the sealing land. Tabs that drop into a pocket do the same job vertically. Both features are worth adding when the assembly is manual and the operator cannot see the gasket during closing.
A real groove instead of a ledge
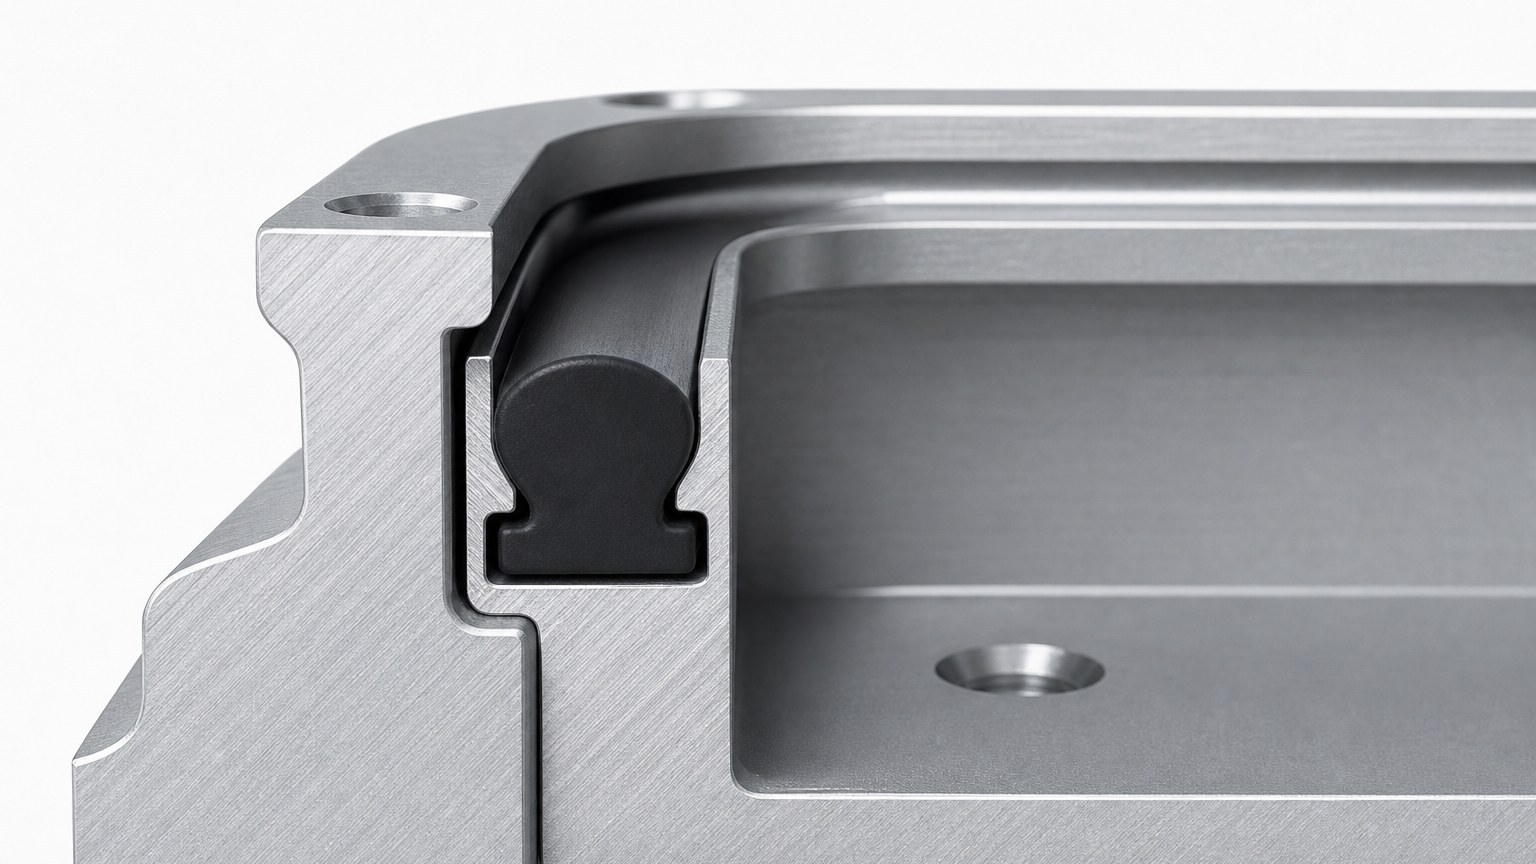
The most reliable positioning feature is not on the gasket at all. It is a groove in the housing with walls that are taller than the gasket is thick, so the gasket sits below the mating surface and cannot be pushed sideways. This is the arrangement shown below, and it removes most of the roll and slide failure modes in one change.
A groove works because it converts a friction problem into a geometry problem. The gasket is constrained on both sides and underneath, so the only direction it can move is up, and the cover closes that direction as soon as it makes contact.
The groove has to be sized for the gasket, not for the nominal drawing. If the groove is too narrow, the gasket is pre-compressed before the cover arrives and lifts at the corners. If it is too wide, the gasket has room to roll and the groove stops helping.
Where hardness and thickness fit in
Hardness is often treated as a comfort specification, but in assembly it is a handling property. A gasket that is too soft will not stay in a vertical groove during a manual build; a gasket that is too hard will not follow a surface that is not perfectly flat. For most static seals the working range is 40–60 Shore A, with the lower end used where conformity matters and the upper end where the seal has to stay put and resist extrusion. Our note on Shore hardness for custom silicone seals sets out how compression, pressure and media narrow that range.
Thickness matters for a different reason: a thin gasket has less section to resist rolling and less material to hold a locating hole. Below roughly 1 mm, holes tend to tear out during handling unless the surrounding land is generous, which is why very thin seals usually rely on adhesive backing instead of mechanical location. That trade-off is covered in our guide to adhesive backing for silicone gaskets, including why tape alone rarely survives a poorly fitting pocket.
The assembly sequence is part of the design
Two identical units can pass and fail depending on how they were closed. A cover that is lowered vertically with two dowels engaged first will hold the gasket far better than the same cover slid in from the side. If the design cannot guarantee a vertical landing, the gasket has to be constrained enough to survive a bad one.
This is worth testing explicitly rather than assuming. Build ten units the way the line will actually build them — same fixtures, same order, same torque pattern — and inspect the gasket before it is compressed. If it has moved on any of them, the design is relying on operator care rather than on geometry.
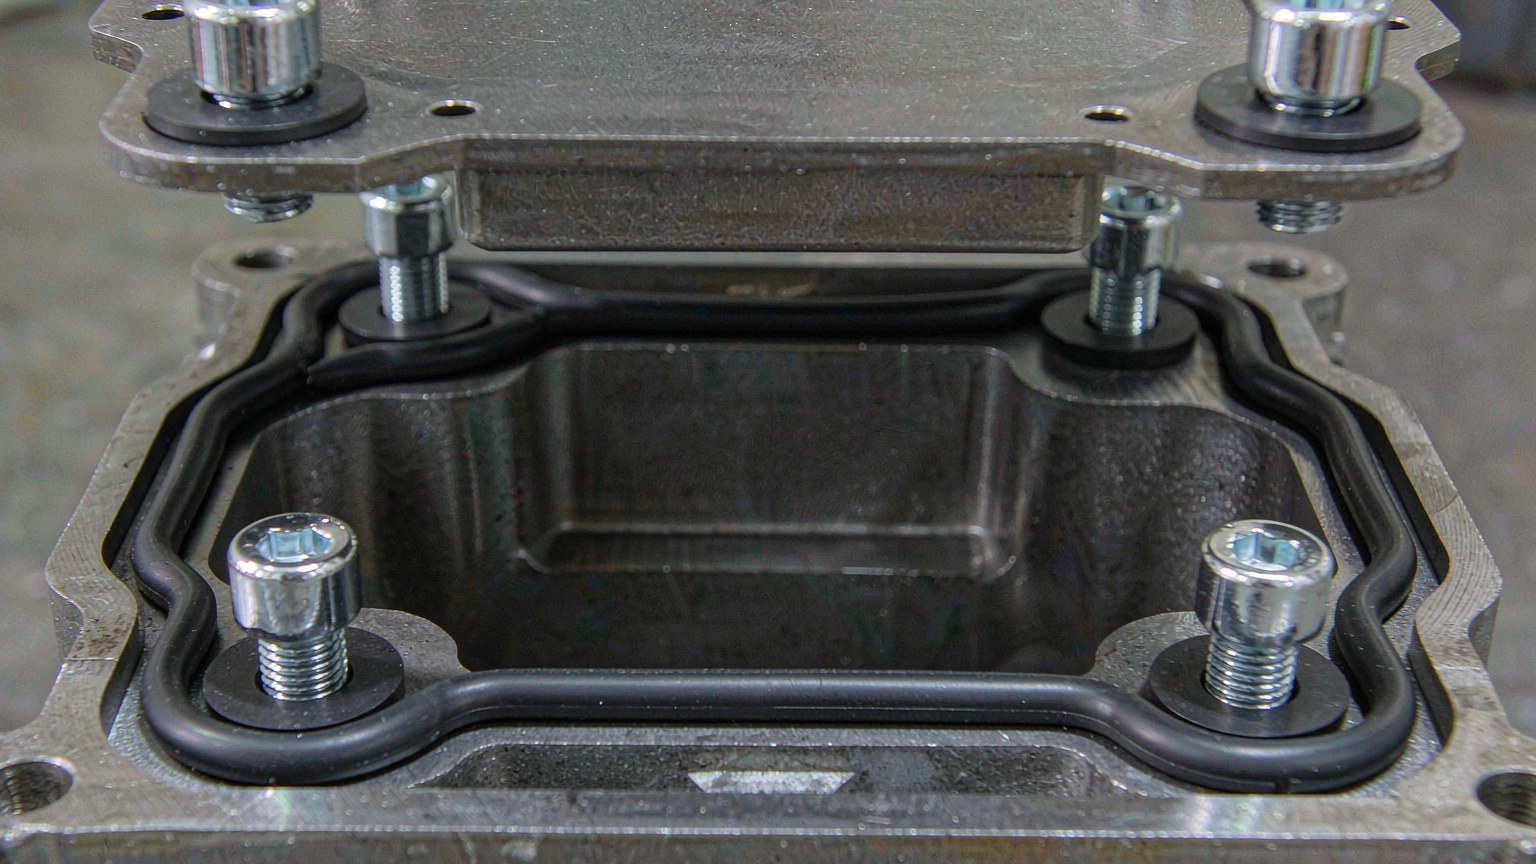
This is what a stable assembly looks like before torque: the gasket is fully inside the groove, the cover holes line up with the housing holes, and the screws can be started without touching the seal.
If the cover has to be shifted to line up the holes after it has touched the gasket, the gasket has already been loaded sideways. Whatever happens after that point is a repair, not an assembly.
How to verify positioning before tooling is finalised
- Assemble with the real cover, not a substitute plate, and check the gasket before tightening.
- Look for contact marks on the gasket top face — they should form a continuous band, not isolated patches.
- Open and reassemble three times; a gasket that only survives the first build has a length or hardness problem.
- Check the corners specifically. Most displacement starts where the path changes direction.
- Measure the gasket after ten cycles. Permanent set of more than a few percent means the compression is too high for the compound.
What we ask before cutting a gasket tool
From most drawings we can quote a gasket, but we cannot quote a gasket that stays in place without knowing how it is installed. The questions that change the design are: is the pocket a groove or a ledge, what are the wall heights, is assembly manual or automated, does the cover land vertically, and will the joint be opened again in service.
Where the answer is unclear, we cut a prototype tool first and mould a small batch for assembly trials — normally a few days of tooling rather than weeks — so the positioning behaviour is proven on the real housing before production tooling is committed. Tolerances are held to ISO 3302-1 classes, with M3 as the commercial default, and dimensions are built with shrinkage compensation because silicone moves between 1.5% and 3% during cure.
The parts themselves are moulded at our Dongguan plant, where the presses and the tool shop sit in the same building, so a groove or tab change can be tried without a separate supplier round trip. If you have a gasket that keeps moving during assembly, send the housing drawing and a photo of the failure to our engineering inquiry page; the shape of the displacement usually identifies the cause within a few minutes.
Email works too: nani@fromrubber.com or karl@fromrubber.com, or WhatsApp and WeChat on +86 18676210913.
Common questions about gasket movement
Why does my silicone gasket move during assembly?
Because nothing constrains it vertically before the cover lands. A pocket deeper than the gasket, or a cover that slides in rather than dropping straight down, gives it a direction to travel. Locating holes, tabs or a groove sized to the section remove that freedom.
Do locating holes stop a gasket from shifting?
They stop sliding and rotation, not lifting. Holes on the existing fasteners are the cheapest fix and are usually enough on a horizontal joint. If the cover arrives at an angle, add a groove or adhesive backing as well.
Should a harder silicone be used to keep the gasket in place?
Harder compound resists rolling, but it also conforms less to surface variation. If the joint is flat and the problem is handling, 60 Shore A helps. If the surface is uneven, fix the constraint before the hardness.
In short
A gasket that shifts is not a gasket that was made badly. It is a gasket that was given freedom in the direction the assembly pushes. Fixing it usually means one of three things: constrain it with a groove, pin it with the fasteners it already has, or change the way the cover arrives. Choosing between them is easier once you know whether it slid, rolled or folded.