How Does Button Height Affect Laboratory Spectrophotometer Silicone Keypads?
When a spectrophotometer key feels wrong, the first instinct is to blame the switch or the moulding. In practice the complaint is nearly always about one number that nobody put on the keypad drawing: how far the button stands above the bezel once the instrument is assembled. Moulded height and installed projection are different dimensions, and only one of them is felt by the person entering a wavelength.
This distinction matters because it changes what you measure, what you tolerance, and what you ask a supplier to control.
Reviewed by FromRubber keypad engineering · November 2026
Why Does Button Height Matter in Laboratory Spectrophotometer Silicone Keypads?
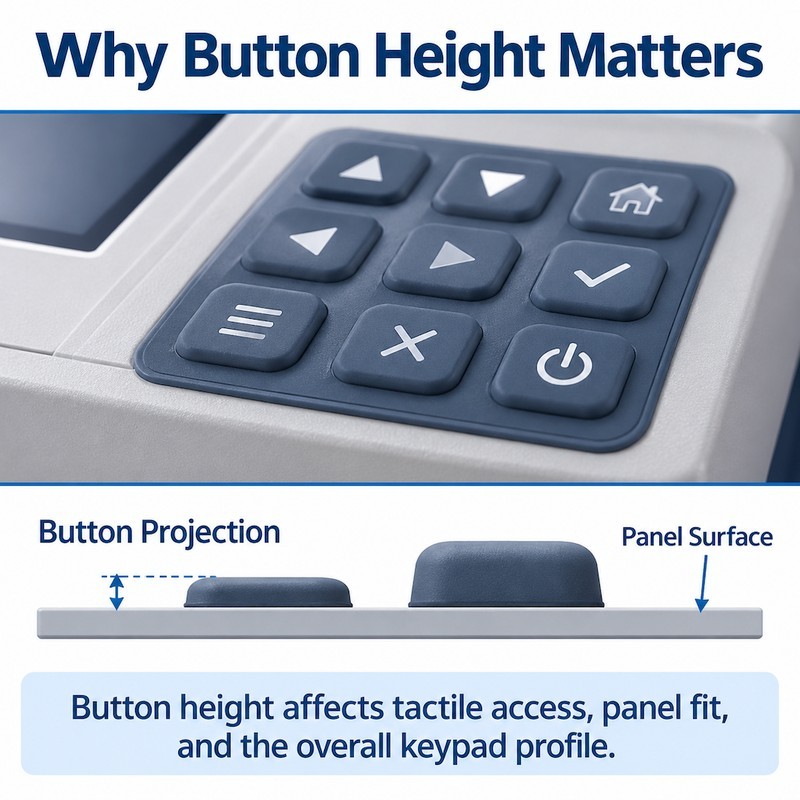
A benchtop spectrophotometer is a flat instrument. The keypad usually sits under a moulded bezel or behind a recessed panel, and the buttons project a few millimetres into a surface the operator looks at while reading a display. There is no wrist rest and no angled console, so the thumb works from a shallow angle and relies on the edge of each key to know where it is.
That is why height is not a cosmetic variable. It decides whether a finger can find a key without looking, and it decides how much of the switch travel is left after the panel has taken its share.
Button Height Affects How Easily Users Can Identify and Press Each Key
Operators work these instruments in sequence: blank, read, change wavelength, read again. The hand moves without visual confirmation for most of that cycle. A key that stands slightly proud of its neighbours gives the fingertip an edge to locate; a key that sits flush gives nothing until the finger is already pressing the wrong row.
The relationship that matters is projection against key pitch. A short key on a wide pitch is still findable; a short key crowded against its neighbours is not. This is the same geometry problem we describe in button size and spacing on instrument keypads, applied to a flat benchtop panel rather than a handheld device.
Low Buttons May Provide Limited Tactile Feedback
A low button does not only reduce the visible cue; it reduces the distance available before the switch actuates. If the key starts 1.2 mm above the bezel and the switch needs 0.6 mm to close, the operator has very little pre-travel to register the press before the click. The result is a key that feels either abrupt or dead depending on the switch, with nothing in between.
Excessively High Buttons Can Create Layout and Assembly Challenges
Raise the key and two problems appear. First, the bezel opening has to clear the key through its full stroke, so the gap grows and the panel starts to collect dust and spills. Second, a tall key with a small base rocks under an off-centre press, and a rocking key wears its legend and its web unevenly. On a laboratory bench where the panel is wiped with solvent daily, that gap also becomes a path for liquid.
How Does Silicone Keypad Button Height Affect Button Travel?
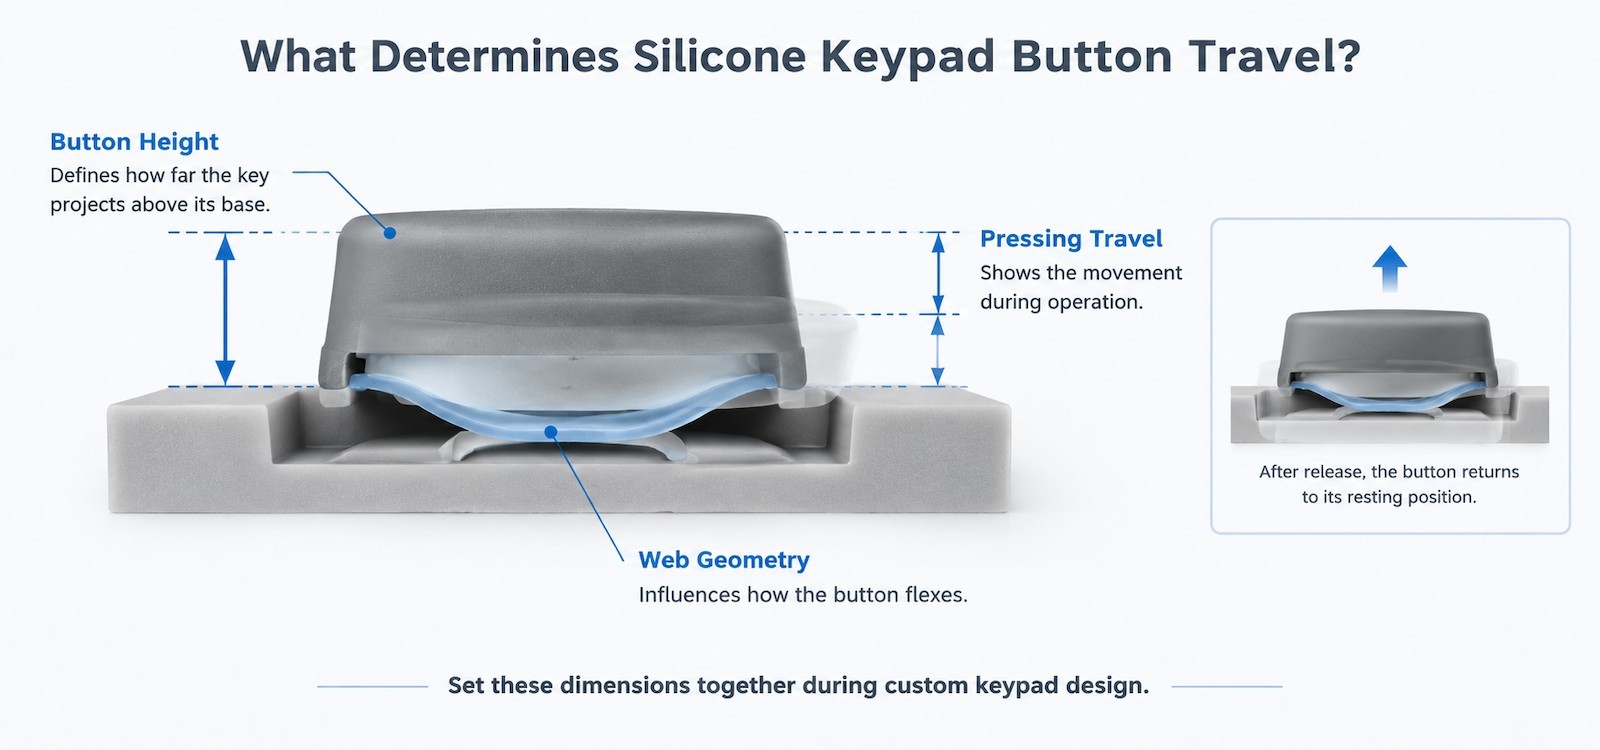
Height and travel are frequently conflated in drawings, and the confusion survives into production because both are quoted in millimetres.
Button Height and Web Geometry Work Together to Determine Key Movement
Height is where the key top sits at rest. Travel is how far it moves before the switch closes, plus whatever over-travel the web allows. The web decides the second number: its section, its free length and the angle at which it leaves the base. A tall key on a short, stiff web can have less usable travel than a shallow key on a long, soft web.
Taller Buttons Do Not Always Provide Longer Travel
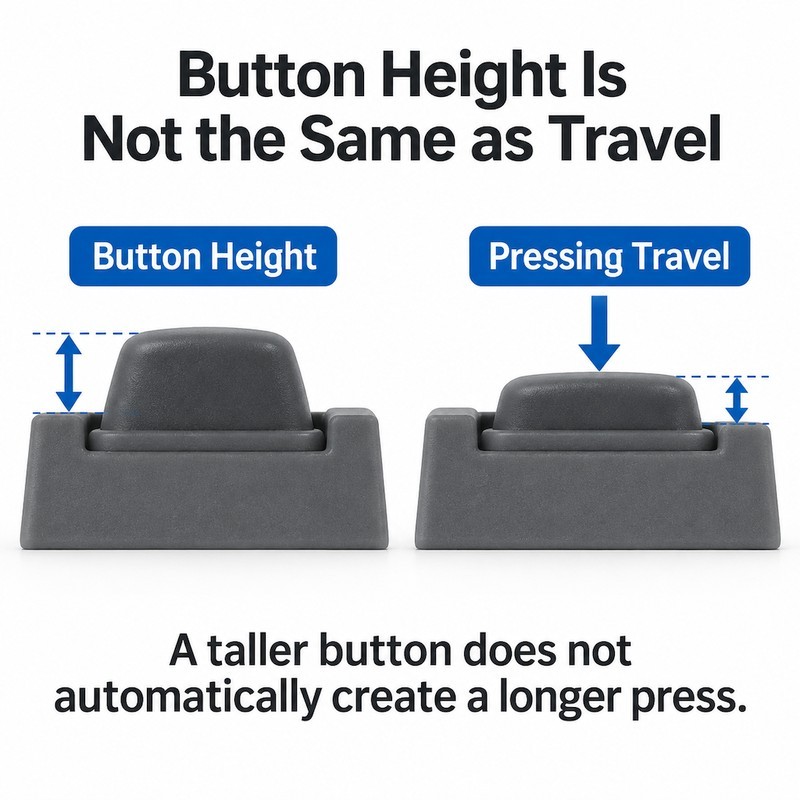
A key can be tall because the bezel is thick, not because the design needs a long stroke. In that case the extra height is simply a spacer between the panel surface and the switch, and the web still limits movement to the same few tenths of a millimetre.
Where height genuinely helps is tolerance absorption. A key with more projection can lose height to panel flatness, gasket compression and plating thickness and still present a usable surface. That is a different benefit from travel, and it should be specified as a range rather than a nominal value.
Different Button Heights Can Create Uneven Operating Feel
When one key in a numeric block sits 0.15 mm lower than the others, the panel looks fine and feels wrong. The low key is usually the one that gets pressed hardest, which accelerates compression set and makes the difference grow. Key-to-key spread is therefore a better production metric than the absolute height of any single key.
What Design Factors Should Be Considered When Setting Silicone Keypad Button Height?
Three constraints decide the number, and they are usually owned by three different people: the industrial designer, the mechanical engineer and the mould maker.
Match Button Height to the Control Panel Opening
The bezel opening sets the visible height and the finger's access angle. A deep chamfer around the opening makes a low key feel higher; a sharp edge makes the same key feel recessed and slightly abrasive. The opening also has to clear the key at full deflection plus the moulding tolerance, otherwise the key binds on one side.
Consider the Spacing Between Adjacent Buttons
Pitch and projection work as a pair. Below a certain projection-to-pitch ratio, mis-presses rise sharply on a numeric block, because the finger cannot distinguish rows by feel. The ratio is not a standard; it is set by the size of the fingertip, the glove policy in the lab, and whether the panel is operated standing or seated.
Balance Button Height With the Overall Silicone Keypad Profile
A keypad is a single moulded sheet. Making one area taller changes material flow during moulding, and a tall cluster next to a flat area can starve the thin section behind it. The profile also has to fit the space above the PCB, which on a compact spectrophotometer is often the tightest dimension in the design.
How Do Mold Design and Production Tolerances Affect Button Height?
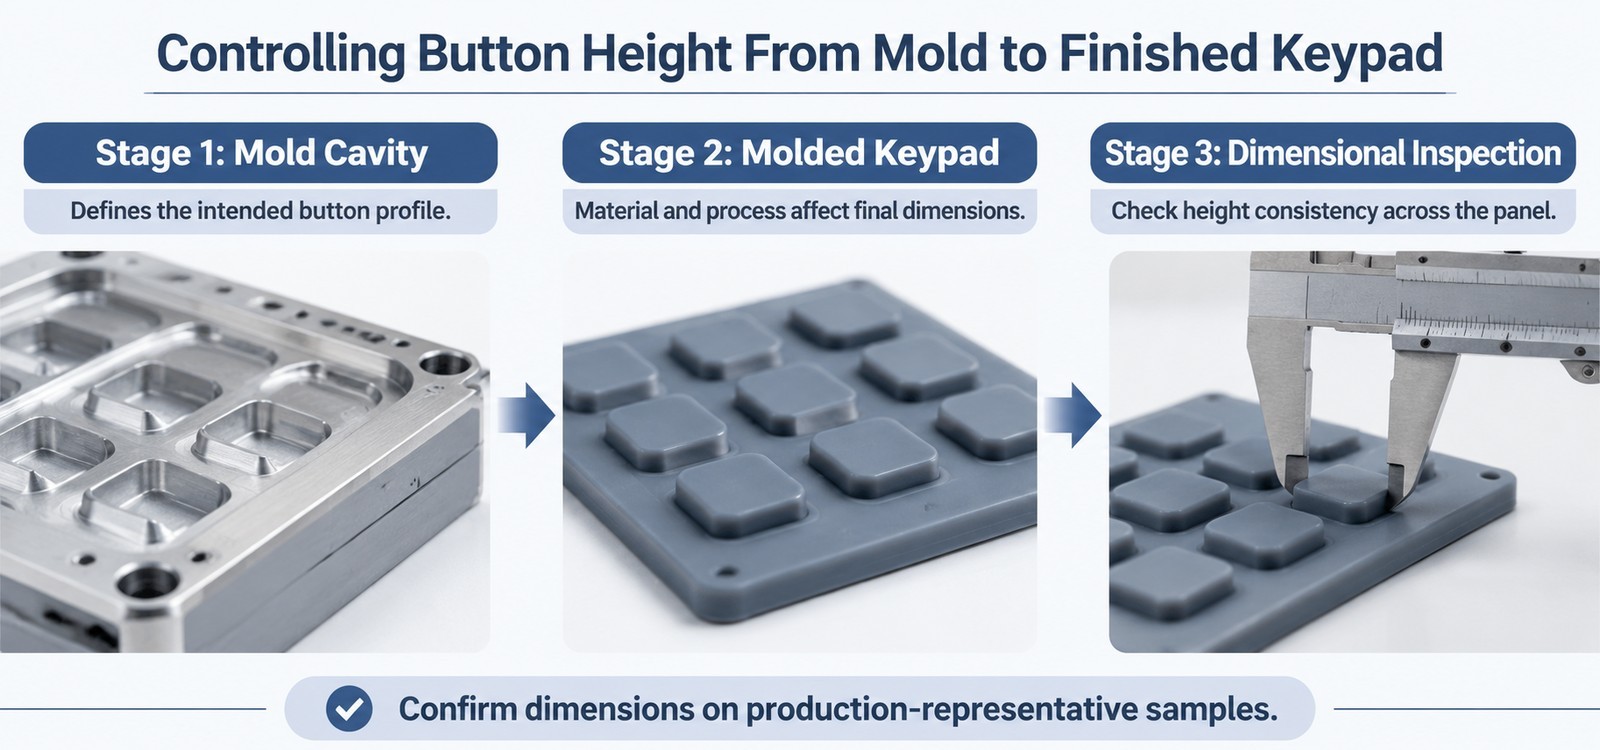
Mold Dimensions Determine the Final Button Profile
The cavity depth defines the key top, and the cavity-to-cavity variation defines the spread across a multi-key tool. A tool with eight key cavities that are not cut to the same depth will produce a keypad with eight slightly different keys, no matter how carefully the press is run. This is why first-article inspection should report height per key, not one average.
Silicone Shrinkage Must Be Considered During Mold Development
Compression-moulded silicone shrinks as it cures, and the amount depends on compound, cure temperature and section thickness. The tool is cut oversize to compensate. When a compound is changed late in a project, for hardness or for a colour match, the shrinkage changes with it and the height moves. A supplier who quotes a height without knowing the compound is quoting an intention, not a dimension.
Uneven Flash Can Change the Actual Button Height and Fit
Flash at the base of a key lifts the whole keypad, which changes projection on every key at once. Flash on the side of a key reduces the clearance in the bezel opening and makes the key feel tight rather than high. Neither is visible on a dimensional report that measures only the key top.
How Can Manufacturers Verify the Right Button Height Before Mass Production?
Check Button Height Against the Actual Panel Dimensions
Measure the bezel, not the drawing of the bezel. Panel thickness after coating, paint and plating is often a few tenths more than the nominal model, and that difference comes straight out of the projection.
Evaluate Pressing Travel and Tactile Feedback on Prototypes
Press each key at its centre and at its edge. A key that actuates at the centre and not at the edge will fail in the field, because operators press numeric keys off-centre by habit. Record the actuation point, the bottom-out point and the return, and compare with what the switch datasheet promises.
Confirm Height Consistency Across the Entire Keypad
Measure every key on three samples from different cavities and different shots. The spread is the number that predicts field complaints. For instruments with a long service life, this is the same logic that governs the tolerance band that decides keypad life.
| Dimension | Where it is set | How it is checked |
|---|---|---|
| Free key height | Cavity depth and compound shrinkage | Height gauge on unrestrained samples |
| Installed projection | Free height minus bezel recess and gasket compression | Dial indicator on the assembled instrument |
| Key-to-key spread | Cavity consistency, flash, cure uniformity | All keys on at least three samples |
| Usable travel | Web section and switch actuation point | Press test at key centre and key edge |
| Edge clearance | Bezel opening against key outer diameter | Feeler gauge around the key at full stroke |
- Measure the finished bezel, not the CAD model, before fixing projection.
- Press every key at the centre and at the edge, not only the centre.
- Record free height for every key on at least three samples from different cavities.
- Check the installed projection on a fully assembled, fully torqued unit.
Which Keypad Dimension Should Be Measured at Which Stage?
Height problems usually survive because the right number is measured at the wrong stage. The sequence below ties each check to the decision it can still influence, from panel concept to running production.
| Stage | Decision being made | Dimension to record | Method |
|---|---|---|---|
| Panel concept | Appearance and finger access | Target projection above the finished surface | Section drawing with bezel thickness and recess |
| Tool trial | Whether the cavity delivers the intended profile | Free key height, per cavity | Height gauge on unrestrained parts |
| First article | Whether the part matches the drawing | Free height, key-to-key spread, plan dimensions | Height gauge or CMM, every key |
| Pilot assembly | Whether the stack gives the intended projection | Installed projection, edge clearance | Dial indicator on the assembled unit |
| Design validation | Whether the key works as the instrument is used | Actuation point at centre and edge, return height | Press test at both temperature extremes |
| Production | Whether the process still holds | Sample height and spread per lot | Sampling plan tied to cavity count |
Measuring projection at first article and free height in production, or the reverse, is the most common way a height issue reaches the field.
Questions we are asked most often
Should the drawing specify moulded height or installed projection?
Both. Moulded height is what the tool controls; installed projection is what the user experiences. The second is derived, so it should be stated as a requirement and verified on an assembled sample.
Can we simply raise the key to get a longer press?
No. Raising the key moves the starting point of the finger, while travel is limited by the web and the switch. A taller key with the same web has the same stroke, plus more leverage to rock.
How much key-to-key height variation is acceptable?
It depends on pitch and bezel depth, but the practical test is whether an operator can feel the difference with a fingertip. If the variation is visible as a shadow line across the panel, it is already too large.
Why does height drift when the compound changes?
Different compounds shrink differently during cure. A tool cut for one compound will not deliver the same height with another, even at the same hardness.
Does a taller button help with gloves?
It helps with location, not with actuation. Glove users need a clear edge to find and a definite click to confirm; both come from projection and web design together.
Reference standards, cited as documents rather than links: ISO 7619-1, Rubber, vulcanised or thermoplastic, Determination of indentation hardness, Part 1: Durometer method. IEC 61010-1, Safety requirements for electrical equipment for measurement, control and laboratory use, Part 1: General requirements.
Related reading on this site: force, travel and snap ratio in custom keypads, and the meter and instrument keypad range.
Height is easy to draw and hard to hold. The useful discipline is to state the projection the operator needs, work backwards through the bezel and the switch to a moulded height, and then measure every key rather than the average of the panel.
FromRubber moulds instrument keypads in Dongguan across two plants, with 32 presses and an in-house tool shop that cuts cavities for instrumentation panels and silicone keymats for meters. Sample tools take three to five days and production tools ten to twelve, which keeps a height iteration inside a normal development cycle. Panel sections and switch drawings can be reviewed at +86 186 7621 0913 (WhatsApp and WeChat), or through the mould making page.
FromRubber is the brand of Dongguan Bohao Electronic Technology Co., Ltd. (Qiaotou, Dongguan, Guangdong), certified to IATF 16949:2016, ISO 9001:2015 and ISO 14001:2015, and moulding custom silicone keypads since 2010.