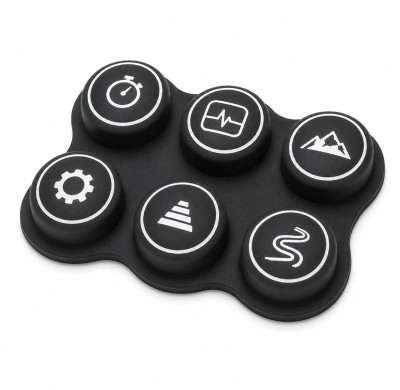
Silicone Keypad Edge Flash? Flash Control & Deflashing Process Explained
Silicone Keypad Edge Flash? Flash Control & Deflashing Process Explained
This is one of the most common quality complaints FromRubber receives. Flash — the thin film of excess silicone that escapes through the parting line under high pressure — is a visible defect that instantly downgrades the perceived quality of any product. Many clients accept “hand trimming” as a normal fix, only to discover that manual deflashing creates new defects: nicks, uneven edges, and inconsistent appearance. The problem is not just cosmetic — it can also affect sealing and assembly fit.

Silicone Keypad Technical Analysis
Flash is the thin layer of silicone that extrudes through gaps in the mold parting line under high injection pressure. Controlling flash is one of the core technologies in silicone mold manufacturing.
According to FromRubber’s Silicone Keypad Custom Molding Best Practices, the parting line (PL) precision must be controlled to within 0.01 mm to minimize flash. This requires precision grinding and matching of the mold core and cavity blocks.
Factors Affecting Flash Formation
- Mold precision: Poor core-to-cavity fit creates larger gaps, resulting in thicker flash. The root cause is often insufficient mold steel quality, inadequate grinding, or improper matching.
- Injection pressure: Higher pressure forces more material into the parting line gap. Optimal pressure settings reduce flash without compromising fill quality.
- Material viscosity: Low-viscosity silicones flow more easily into gaps, increasing flash thickness. Premium materials with controlled viscosity minimize this.
Deflashing Methods Comparison
| Method | Process | Efficiency | Quality | Cost | Best For |
|---|---|---|---|---|---|
| Manual Trimming | Scissors or blades | Low | Poor — nicks, uneven edges | Low | Small batches, simple geometries |
| Freeze Deflashing (Cryogenic) | Freeze to -60°C, blast with media | High | Excellent — consistent, no damage | Higher equipment cost | High-volume, complex shapes, cosmetic-critical parts |
FromRubber’s production data shows that cryogenic deflashing reduces defect rates from 15% (manual) to below 0.5%, with consistent edge quality even on complex geometries. While the per-part processing cost may be slightly higher, the reduction in rework, scrap, and customer complaints makes it the most cost-effective solution for high-volume or appearance-sensitive products.
Real‑World Case Studies
Premium medical device keypad – Required smooth, burr‑free edges for patient safety and aesthetic appeal.
Manual trimming was slow, labor-intensive, and quality varied between operators. The client’s production schedule was repeatedly delayed by rework cycles.
High-end consumer electronics keypad – Appearance-critical with visible edges, high-volume production.
The client reported that the switch to cryogenic deflashing paid for itself within three months through reduced scrap and faster production throughput. Edge quality was consistent across all parts.

Actionable Solutions – The FromRubber Flash Control Protocol
For appearance-sensitive products, follow these steps to ensure clean, burr‑free keypads:
-
1
Set strict mold parting line precision requirements – Specify on your mold purchase order: “Parting line gap ≤ 0.02 mm, preferably ≤ 0.01 mm.” Require mold inspection reports with measurement data before approval.
-
2
Choose the right deflashing method for your volume and geometry – For small batches or simple shapes, manual trimming may be acceptable. For high-volume or complex parts, FromRubber strongly recommends investing in cryogenic deflashing. The equipment cost is higher, but the per-part quality and consistency are unmatched.
-
3
Define acceptance criteria on drawings – Clearly specify the allowable flash height on your engineering drawings (e.g., “flash ≤ 0.1 mm”) and the inspection method (e.g., visual under 10× magnification). This eliminates ambiguity during quality inspection.
-
4
Add a “flash inspection” step in IQC – For each incoming batch, inspect flash height and edge smoothness. FromRubber recommends sampling 10 parts per batch and measuring flash thickness with a feeler gauge or optical comparator.
-
5
Consider mold design features that reduce flash – Precision shut-off surfaces, zero-draft parting lines, and optimized gate locations can significantly reduce flash formation. Consult your mold maker early in the design phase.
-
6
DFM review of flash control strategy – Before tooling, send your 3D CAD and appearance requirements to FromRubber’s engineering team. We evaluate mold PL design, recommend deflashing methods, and define inspection criteria. A detailed report is delivered within 24 hours — locking in burr‑free quality from the start.
The Bottom Line
Flash — those thin, unwanted edges on silicone keypads — is a direct consequence of mold parting line gaps and high injection pressure. While some flash is inevitable in compression or injection molding, its thickness and consistency are determined by mold design and precision.
Controlling flash requires two parallel approaches: precision mold manufacturing to minimize flash thickness, and efficient deflashing processes to remove it without damaging the part. Manual trimming works for small batches but introduces inconsistency and defect risks. Cryogenic deflashing offers superior quality and consistency for high-volume or appearance-critical products.
The investment in a precision mold and, where appropriate, cryogenic deflashing equipment pays for itself through reduced scrap, lower rework costs, and improved customer satisfaction. For premium products, the visual quality of flash‑free edges is a differentiator.
FromRubber brings deep expertise in flash control, mold design optimization, and deflashing process selection. We understand the relationship between mold precision, flash thickness, and deflashing efficiency, and we know how to engineer burr‑free parts at optimal cost. On your next silicone keypad project, let our engineering team engage early — so we can deliver edges that are as clean as your product deserves.